
Stage 9 · A comfortable bed with useful space underneath
Building your campervan bed frame
A good bed is more than a rectangle of timber. It needs to fit the people sleeping in it, support the mattress, leave room for everyday life and stay properly secured in the van. Start with the space and the mattress, then build the frame around a considered design.

Choose the layout you will enjoy using
Think about a normal evening and morning. Do you want the bed ready all the time, or would you rather gain daytime seating? Where will the bedding go? Can both people get in and out comfortably? There is no single best layout for every converter.
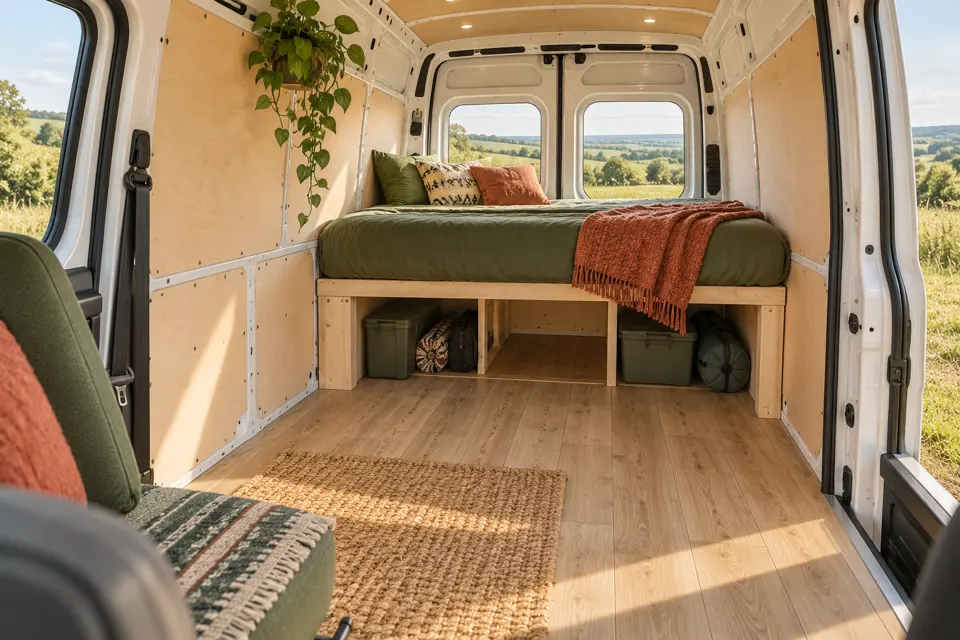


A removable weekender platform is another possibility if you need the van for other jobs. “Removable” still means properly restrained for travel. Think through where its sections will be stored and how safely you can lift them.
The personal build planner can help compare approximate layouts. Its model dimensions and drawn furniture are a starting point. Recheck the actual finished van before ordering a mattress or cutting a frame.
1. Check the space where your body will actually be
Start with the tallest sleeper and the way you sleep. Allow a comfortable usable length rather than choosing a mattress that only fits if your head or feet press against the walls. Include pillows, bedding, trim and the space lost to curved bodywork.
For a side-to-side bed, measure the finished width at the intended mattress height and through the space your shoulders, head and feet will occupy. A maximum body width near the floor does not confirm the sleeping length higher up. Insulation, lining, ribs and window reveals can reduce it.
For a lengthways bed, check the finished length with rear doors closed and any front cabinet, bulkhead or seat in its normal position. Make sure the mattress can be brought through the door and into position; a custom shape that fits the base may still be awkward to manoeuvre.
Ask the mattress supplier about the finished size, thickness, tolerances, corner shapes and required base before finalising the frame. Some mattresses must not be folded, cut or bent tightly. Do not trim a bought mattress unless the manufacturer confirms a suitable method.
- Record the clear sleeping surface, not just the outside dimensions of the frame.
- Check wall taper at more than one point along the bed.
- Include any ventilation underlay or spring system in the height.
- Allow the fitting and movement clearances required by the chosen system.
- Check that a door, window or emergency route you need will remain usable.
2. Mock up the height before committing
Use tape on the floor and stable cardboard mock-ups to make the footprint easier to understand. Cardboard is for checking the space, not for standing or sitting on. Use a properly supported temporary seat if you want to try a sitting height.
A high bed makes a bigger garage underneath, but leaves less room to sit up and can be harder to climb into. A lower bed may feel more open while reducing storage. Check the compromise with the mattress thickness included.
Try the route past the bed, opening nearby cupboards and reaching the side door. Think about getting up in the night with the normal bedding in place, not an empty floor plan.
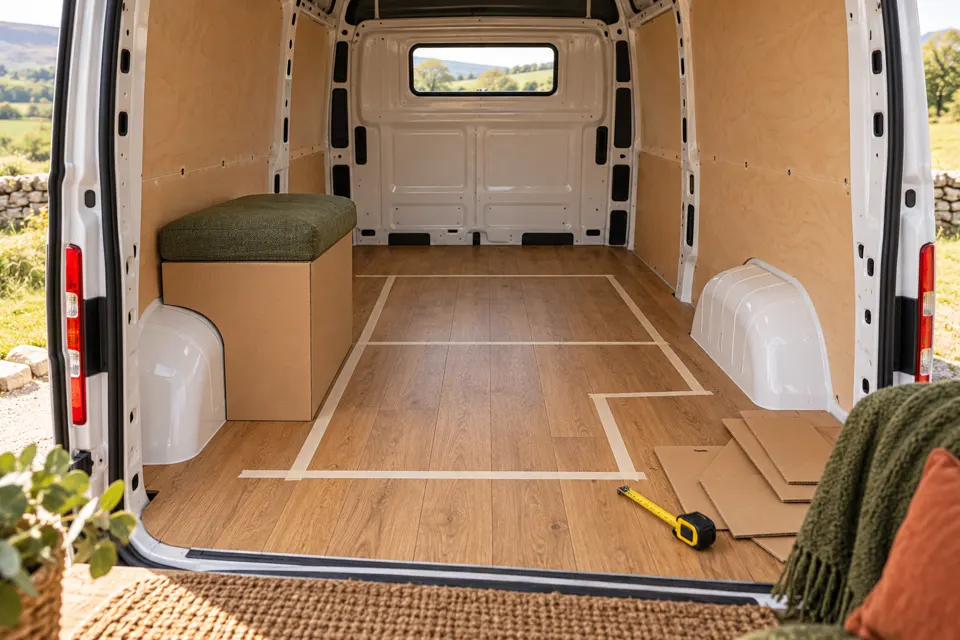
For a basic height check, measure from the finished floor to the finished ceiling above the sitting area. Subtract the height of the mattress top to see what remains. As an arithmetic example, a 1,850 mm interior with a mattress top at 850 mm leaves 1,000 mm above it. Those are invented example dimensions, not a suggested bed height or a fit claim for your van.
Put the biggest planned storage item beside the mock-up and allow for the real door or drawer opening. Check the wheel arches too: a frame leg or box side must fit around them without forcing the finished lining.
3. Choose a support system before choosing the timber
Decide whether to use a vehicle-specific kit, a commercial bed system or a designed timber/plywood frame. Compare the complete arrangement: where the mattress is supported, where people will sit on the edge, how the frame resists sideways movement and how it attaches to the van.
A simple load path means you can explain how weight travels from the mattress through slats or platform, rails and supports, into the intended vehicle attachment/support structure. A decorative box can look substantial while having weak joints; a large open garage can leave a surprisingly long unsupported span.
| Part | What to settle before cutting |
|---|---|
| Rails and cross-members | Material grade, section, span and connections for the intended loads, including someone sitting on an edge. |
| Legs or supporting boxes | Where they bear, how they are restrained and whether the floor assembly can accept those loads. |
| Mattress support | Base type, slat/platform requirements and support spacing accepted by the mattress and bed-system maker. |
| Bracing and joints | A deliberate way to resist racking, not reliance on a loose decorative face panel. |
| Vehicle attachment | Permitted locations and an appropriate designed fixing arrangement for your actual vehicle. |
There is no universal timber section, bolt size or screw pattern that this page can approve. If designing the structural parts is outside your experience, a suitable documented kit or help from a competent converter can make the job more manageable. Check exactly what a kit’s stated rating covers: the frame, its installation conditions, or the complete vehicle installation.
Use sound material of the specified grade. Check timber for splits, severe distortion and defects where joints will go. Confirm plywood type and thickness rather than substituting an unidentified offcut. Do not assume that adding more heavy timber is the best way to make a design sound.
4. Assemble carefully on a stable surface
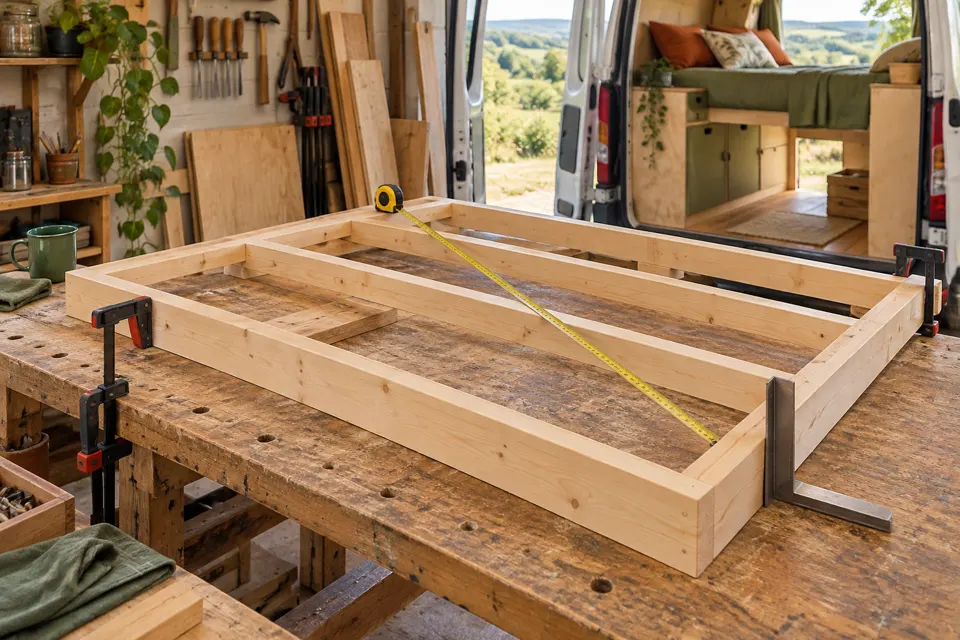
Make a cutting list from the chosen design and label pieces by location. Account for the way the joints overlap: the outside bed length is not necessarily the length of every rail. Cut a trial piece and check your measuring method before making a batch.
Work on a stable surface, support the material and use clamps appropriately. Keep saw work away from the van’s wiring and finished surfaces. Follow the tool instructions and control the dust.
- Check the first pieces. Compare matching rails and confirm the cut faces are suitable for the intended joint.
- Dry-assemble. Set the pieces out in their actual positions before applying adhesive or making permanent connections.
- Check for square. For a rectangular section, check the corners with a square and compare both diagonals. Equal diagonals are a useful assembly check, not a strength test.
- Make the specified connections. Use the correct joint, fastener, pilot-hole and adhesive requirements. A handful of general-purpose screws is not a substitute for the designed connection.
- Trial-fit manageable sections in the van. Confirm door access, floor bearing points, wheel-arch clearance and the finished mattress space.
Do not force a square frame into a tapered van by winding fixings tighter. Recheck the design and interface with the body. Allow specified coatings and adhesives to cure before loading the assembly.
A removable build can be assembled in sections, but the connections between sections need just as much thought as the individual frames. Keep repeatable joints accessible and record how the assembly goes together.
5. Secure the bed as part of the vehicle conversion
The bed must do more than support sleeping weight when parked. Its attachment needs to deal with vehicle movement and the intended installation loads. Design the frame, its connections and its attachment together; do not treat restraint as a few brackets added at the end.
Use the correct vehicle conversion/body manual and a suitable fixing design. Lining plywood, small trim battens and the decorative floor covering are not automatically adequate anchors. A support leg bearing on the floor and a fixing restraining the frame have different jobs.
Before any drilling, positively identify the permitted location and what lies behind and beneath it. Avoid hidden wiring, pipes, fuel/brake systems, structural no-drill areas and exterior panels. Where a fixing is permitted, follow the specified details for fasteners, bearing surfaces, corrosion treatment and sealing. Existing holes or lashing points are not automatically suitable for a new use.
Keep the final attachment accessible for the inspection and maintenance the design requires. Record the fixing arrangement and any manufacturer or installer instructions with your build documents.
6. Fit a base that suits the mattress
Choose the base with the mattress supplier before buying slats or cutting a platform. Required slat width, clear gap, support and permitted base type depend on the product. Advice for one household mattress is not a universal campervan rule.
Slats need appropriate bearing at their ends and any intermediate support required by the design. Secure them using the chosen system so they do not wander, tip or rattle. Check the edges are smooth and free of protruding fasteners.
If using a platform, use a specified panel and support arrangement. Cutting ventilation holes changes the panel; do not place large cut-outs through load-bearing areas without design guidance.
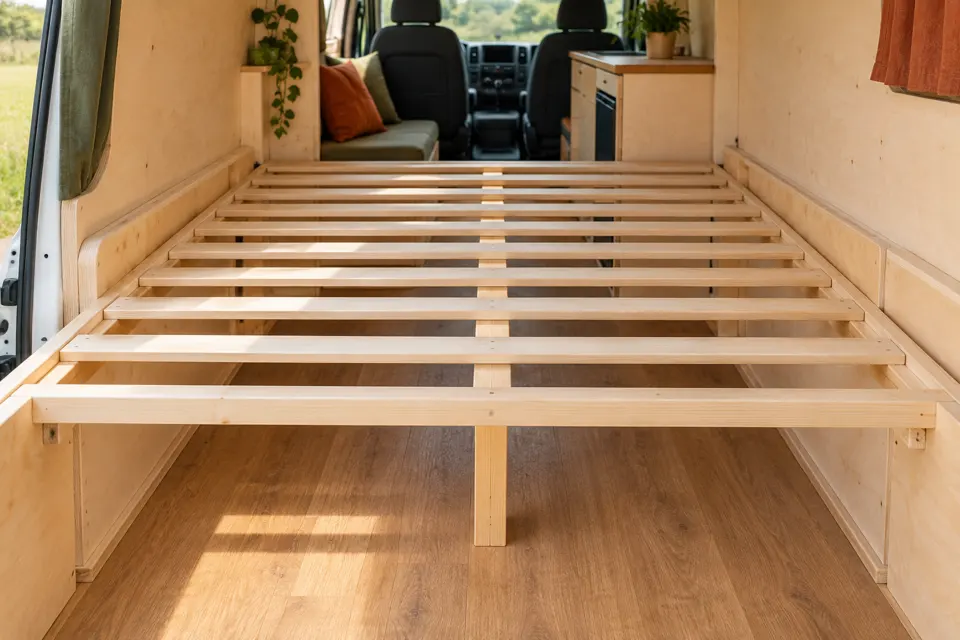
Check the whole perimeter, including corners where a mattress could rub against trim. Fit any specified mattress retainers without creating sharp contact points or obstructing access. Do not assume a loosely placed household slat roll is secured for vehicle use.
A purchased spring system can add comfort and airflow, but it also adds height and has its own mounting and support requirements. Confirm compatibility with the frame, mattress and any lifting sections rather than layering products together without checking.
7. Make the space underneath genuinely usable
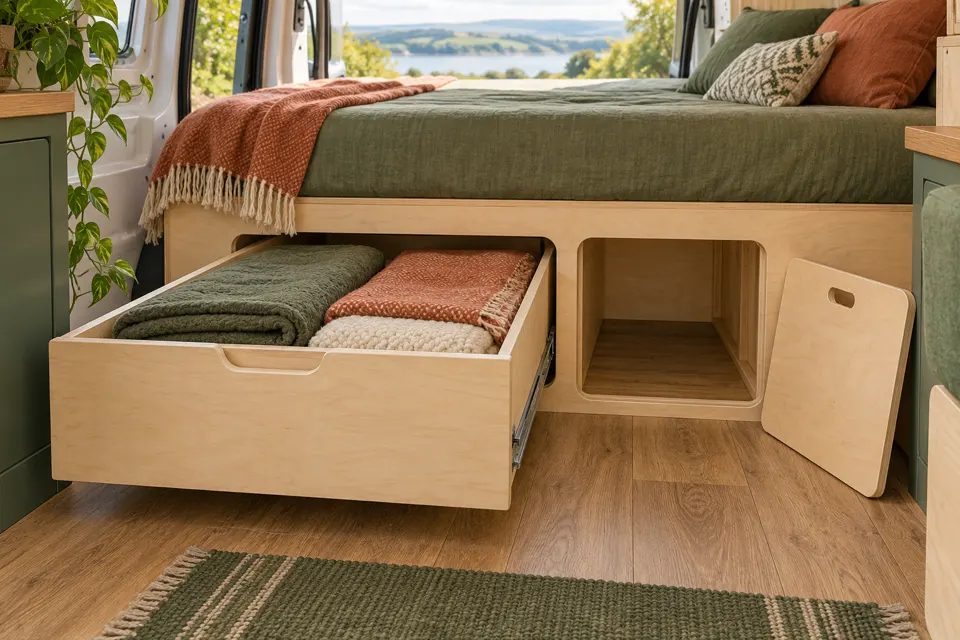
Decide what goes underneath before dividing the space. A tall garage is useful for bulky kit, while smaller front-access drawers can be easier for clothes and bedding. Check the opening size as well as the volume inside.
Keep heavy stored items low where practical and provide suitable restraint for the contents. A storage box that fits neatly can still move during braking. Fit closures and travel retention appropriate to the drawer, load and vehicle use.
Do not place batteries, heaters, gas storage or tanks in a compartment simply because it is empty. Each system has its own mounting, ventilation, separation, clearance and servicing requirements. Plan those with the relevant installer before closing the bed front.
Test access with the mattress and normal bedding in place. Can you reach a required isolator or inspection point without dismantling the whole bed? Can the component be removed for replacement? Leave a usable route for hands and tools.
If using a lifting section, choose hinges, stays, latches and protection for the actual lid and mattress load. A gas strut is not automatically a safe hold-open arrangement. Plan how to prevent an accidental drop, pinching and movement during travel; never work underneath an inadequately supported lid.
Leave required airflow paths clear when packing. Keep damp boots and wet outdoor gear separated from bedding, and make the compartment easy to inspect and clean.
8. Give the mattress a chance to dry
Plan airflow under the mattress and a way to inspect its underside. Slats or a compatible ventilation system can help, but only if the surrounding compartment is not packed so tightly that air cannot move. The whole van still needs appropriate ventilation and moisture management.
An underlay is one part of that plan, not a promise that condensation will disappear. Follow its instructions for coverage, edges and installation, and include its height in your bed measurements.
Lift or air the mattress as recommended by its maker and inspect regularly, particularly after cold or damp trips. If you find moisture, investigate leaks, ventilation, wet storage and cold surfaces; do not simply cover the damp patch with another layer.
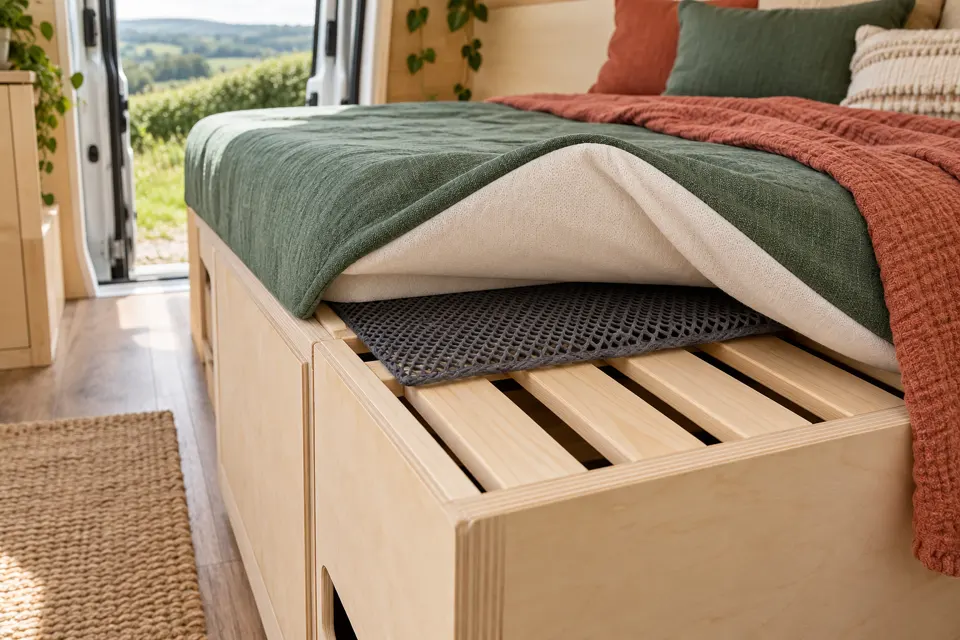
Use a finish compatible with the materials and allow it to cure before putting the mattress down. Avoid wrapping the base in an impermeable covering unless that is part of a specified system. Keep the mattress clear of persistent damp against walls and door edges.
Extra checks for a bed that converts from seating
Try the full conversion before final upholstery. Move the table, extend the base, fit every cushion and lie out the sleeping surface. Check that cushion joints are comfortable and that you have somewhere for bedding during the day.
- Support the extension. A table top, sliding slat or loose infill needs its intended bearing and restraint. Drawer runners are not automatically rated as bed supports.
- Secure moving parts. Provide the specified stops, locks and travel retention so the assembly cannot extend or fold unexpectedly.
- Check both layouts. Access, ventilation and door routes must still work in night mode.
- Protect fingers. Check pinch points while moving frames and cushions.
- Keep the routine realistic. If it takes a complicated rearrangement every night, reconsider the layout before building more furniture around it.
Use a suitable documented mechanism or a properly designed arrangement. A convincing picture of an extended bed is not evidence that a similar-looking mechanism will carry the intended load.
9. Smooth the edges and check the finished assembly
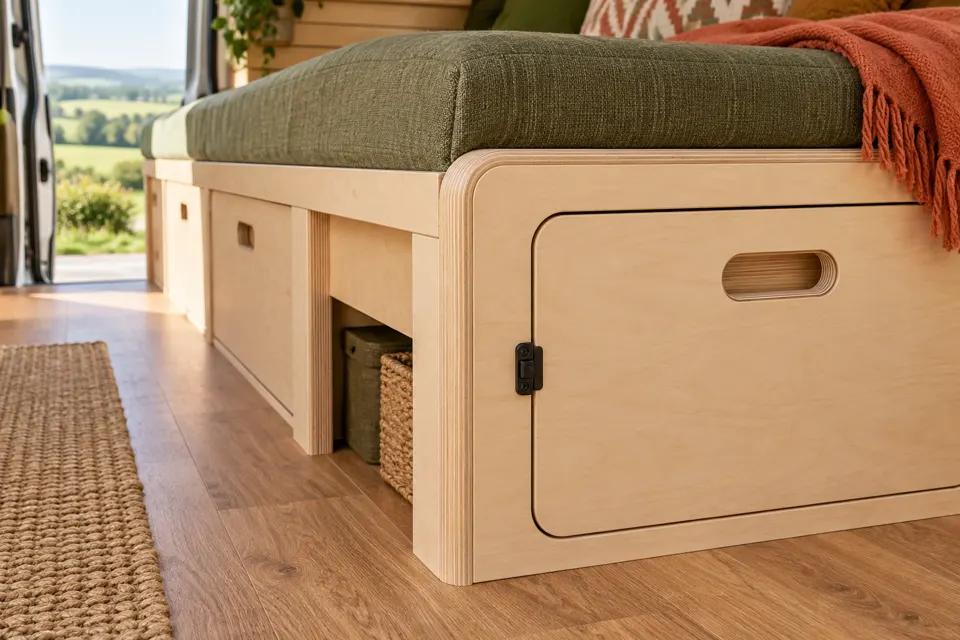
Ease sharp exposed corners and remove splinters without weakening structural parts. Finish cut edges and faces with products suitable for the material and location. Keep fastener heads and rough hardware away from the mattress and bedding.
Inspect against the chosen design or kit instructions before loading it. Check joints, bracing, attachment, base support and closures. If something rocks, slips, splits or has a loose connection, stop and correct the cause.
Follow the manufacturer’s or designer’s commissioning/load-check procedure. Do not improvise a proof test by jumping on the bed or driving over bumps. Sitting on it successfully is not a structural rating or evidence of adequate crash restraint.
After fitting the mattress, check the clearances again. Confirm you can get in and out, sit where intended, open storage and operate the nearby doors and windows. Reinspect at the intervals required by the system and after any movement, damage or unusual noise.
Tools and materials
| Job | Useful items |
|---|---|
| Mock-up and setting out | Tape measure, masking tape, cardboard, pencil, square, straightedge and a sketch of finished dimensions. |
| Frame preparation | Specified timber/panels, suitable saw and blade, stable work support, clamps and sanding tools. |
| Assembly and installation | Correct connection hardware, drill bits and driver, specified adhesive where required, and the vehicle attachment instructions. |
| Base and access | Compatible slats/platform, any specified ventilation system, suitable access hardware and travel closures. |
| Protection | Appropriate dust extraction, eye/hearing protection, respiratory protection for the task and protection for the van’s finish. |
Control cutting and sanding dust at source. Use suitable extraction and a separate work area rather than filling the van with dust. HSE recommends M- or H-class extraction for this work and suitable respiratory protection where required; tight-fitting masks need correct fit. Follow tool and material instructions, and clean with an appropriate vacuum rather than blowing dust around.
Allow for the whole job, not just the wood
Make a cutting list and check how it fits the available stock sizes. Include the rails, supports, base, bracing, faces, joints, hardware, finish and any specialist attachment work. Keep a small allowance for mistakes and a few useful repair offcuts.
| DIY materials allowance | Illustrative amount |
|---|---|
| Frame/support material and simple facing panels | £100–£220 |
| Mattress base and ventilation provision | £50–£160 |
| Assembly/access hardware and basic closures | £35–£100 |
| Finish and consumables | £25–£60 |
| Example materials total | £210–£540 |
These are CamperSteps editorial planning allowances, not supplier quotations. They exclude the mattress and bedding, tools, labour, engineered vehicle anchoring, specialist mechanisms and fitted equipment below the bed. Custom kits, extensive drawers and premium materials can cost more. Get a separate quote for any designed attachment or mechanism rather than assuming it is covered by the hardware line.
Keep the frame in your Van build → Bed frame allowance and the mattress in Equipment and furnishings. Avoid counting base boards, finish or fixings twice if you already allowed for them elsewhere. Reading this guide does not change any saved budget or equipment choice.
Record the assembly weight, including its base and hardware. As an arithmetic example, a 25 kg frame, 8 kg base and 12 kg mattress add up to 45 kg before bedding and stored contents. These are hypothetical weights, not a recommended build or a payload approval. Check the completed conversion’s vehicle and axle loading separately.
Expect planning, mock-ups, cutting and trial fitting to take several sessions, plus any curing time. A simple documented fixed frame is usually a more manageable first woodworking project than a complicated lift-up or sliding mechanism. Finish one working arrangement before adding optional drawers and decorative details.
Before calling the bed finished
- The actual finished sleeping length, width and mattress fit have been checked.
- Mattress thickness and any underlay are included in sitting-up and access checks.
- The frame, joints, base and supports follow a suitable design or kit specification.
- The vehicle attachment arrangement is appropriate and its instructions are recorded.
- Slat gaps/base type match the actual mattress requirements.
- Moving parts, drawers, removable pieces and stored contents have suitable travel retention.
- Required service access, airflow and equipment clearances remain usable.
- Edges are smooth, coatings are cured and no hardware can damage the mattress.
- Doors, windows and necessary routes work with the bed made up.
- Inspection/commissioning checks are complete and any defects have been corrected.
- The frame costs, mattress costs and assembly weight are recorded without double-counting.
You now have a sleeping space planned around the finished van. Keep the drawings and attachment details with your build records, then use the remaining floor space to refine the kitchen and storage layout.
Instructions and further reading
Original CamperSteps writing and illustrations. The workflow and examples are general editorial guidance, not a structural design, travel-seat approval or guarantee of fit. Follow the actual vehicle, bed-system, mattress and hardware instructions, with competent design where required.
- Ford Pro: conversion resources and Body and Equipment Mounting Manual requirements—obtain the correct conversion guidance for your own make, model and year.
- Silentnight: mattress care and suitable-base requirements—an example of manufacturer-specific base requirements, not a recommendation of domestic products or confirmation of a campervan warranty.
- Froli: motorhome sleeping-system support and ventilation information—one commercial approach, not a product price used in this guide.
- HSE: controlling dust when cutting and sanding wood.
- CamperSteps: walls and ceiling.
Sources checked 1 November 2026. Prices, weights and dimensions in examples are planning figures, not checked quotations or confirmed vehicle measurements.