
Stage 8 · Making the shell feel like home
Lining your campervan walls and ceiling
This is where the inside starts to look like a camper. Choose a finish you can live with, give it proper support, and take your time with the edges. A simple, carefully fitted plywood wall can look better than expensive cladding rushed into place.
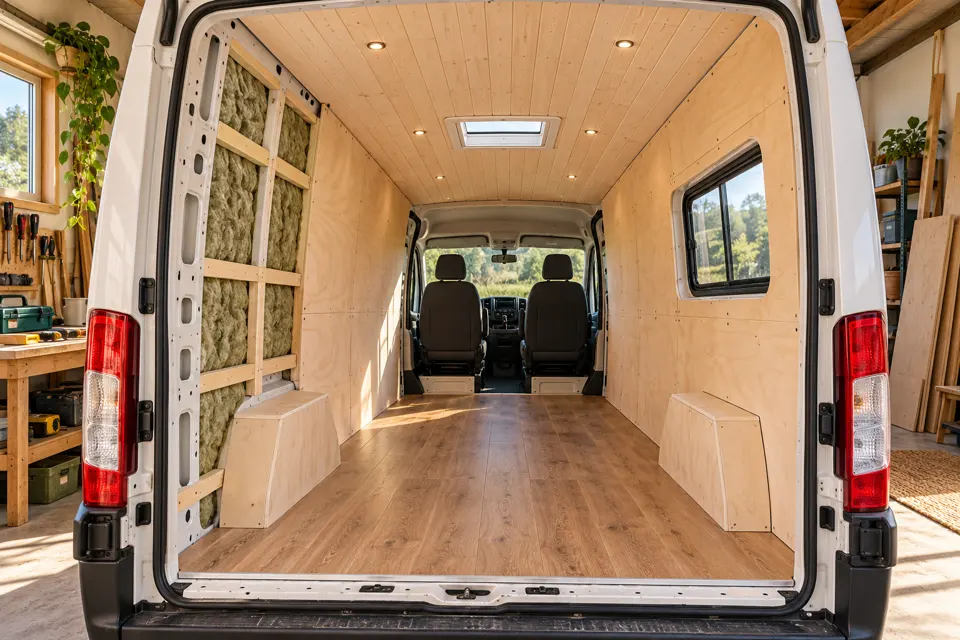
Before you close anything in
It is tempting to cover everything as soon as the insulation is in. Pause for a final look first. Removing a finished panel to reach one forgotten cable is frustrating; removing glued cladding can mean starting again.
- Check the shell is dry. Deal with leaks and rust rather than hiding them. Inspect the window and roof-opening work already completed.
- Finish the hidden preparation. Agree routes for wiring, lighting, water pipes and any other services with whoever is designing or installing them. Complete the relevant first-fix work and checks before enclosing it.
- Know what must stay reachable. Plan access to service joints, inspection points, door mechanisms and any equipment that needs maintenance. Do not bury a fuse box behind a permanent wall.
- Review insulation and moisture details. Follow your chosen insulation system at ribs, edges and penetrations. Keep factory drains and required ventilation clear. Lining does not cure condensation or a leaking shell.
- Mark heavy furniture locations. Bed frames, overhead cupboards, tanks and other loaded items need their own suitable attachment to the vehicle structure. Decorative lining and its small screws are not proof of adequate restraint.
Photograph each wall square-on before covering it, with a tape measure visible or a separate dimension sketch. Record the backing, cable routes and intended fixing areas. Keep the pictures with your build records so future alterations are less of a guessing game.
Choose the finish before buying the backing
Start with the look you like, then check weight, thickness, support and upkeep. You can mix materials: plain painted plywood on the walls with a timber-look ceiling, for example. A sample is useful for checking colour in daylight and under your planned lights.
Compare the actual product, not just the name. “Lightweight plywood” covers different cores and finishes; “cladding” can mean solid timber, laminated boards or plastic systems. Ask for the weight and fitting instructions.
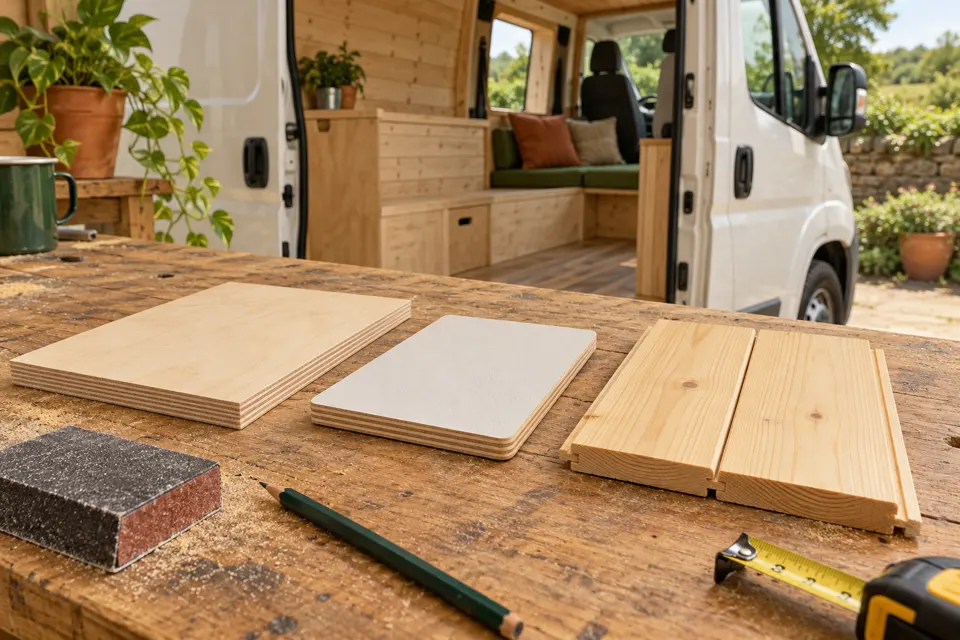
| Option | Why consider it? | What to check |
|---|---|---|
| Plain plywood | A simple face you can paint or finish, with large panels and relatively few joints. | Actual board grade, weight, thickness, support requirements and whether it will follow your van’s curves without excessive force. |
| Decorative or laminated plywood | A ready-made surface can reduce finishing work. | Cut-edge treatment, scratching, matching trims, adhesive compatibility and the supplier’s intended use. |
| Timber tongue-and-groove | A warm appearance with individual boards that are easier to handle than a large sheet. | Total weight, timber movement, support direction and a secure vehicle-appropriate fixing method for each board. |
| Carpet-covered panels | Can soften the appearance and disguise small surface imperfections. | Suitable lining carpet and adhesive, cleaning, odour/curing instructions and access to removable fasteners. |
Thin boards can be easier to curve but may need more support. Thicker boards take more space and weight and may resist the shape you are asking them to follow. Choose thickness and backing together from the product guidance; there is no single sheet thickness that fits every van and every use.
Check the suitability of the complete lining system near cooking and heating equipment. Timber, carpet and decorative plastic are not interchangeable heat shields. Required clearances and protective construction come from the appliance and lining instructions, with specialist design where needed.
1. Plan the panels, joints and finished space
Sketch the wall and ceiling faces before cutting. Put joins where there will be support, and think about how the panel will get through the van door. One enormous sheet can be awkward to handle and difficult to remove later.
- Draw the fixed features: windows, wheel arches, rooflights, door openings and the cab transition.
- Add furniture outlines: a join behind a cupboard may be less noticeable, but it still needs support. Keep service openings accessible after the furniture goes in.
- Mark backing and safe fixing areas: show where each panel edge and joint will land.
- Check the finished dimensions: battens, insulation details and lining reduce usable width and headroom. Recheck tight beds, cabinet runs and the wet room against the finished faces.
- Choose the edge treatment: a small deliberate joint with a neat trim often looks better than an irregular edge forced against the next panel.
Do not assume the left and right walls are identical. Vans can have different recesses, door mechanisms and previous repairs. Make separate templates wherever the shape or clearance differs.
2. Prepare a consistent backing surface
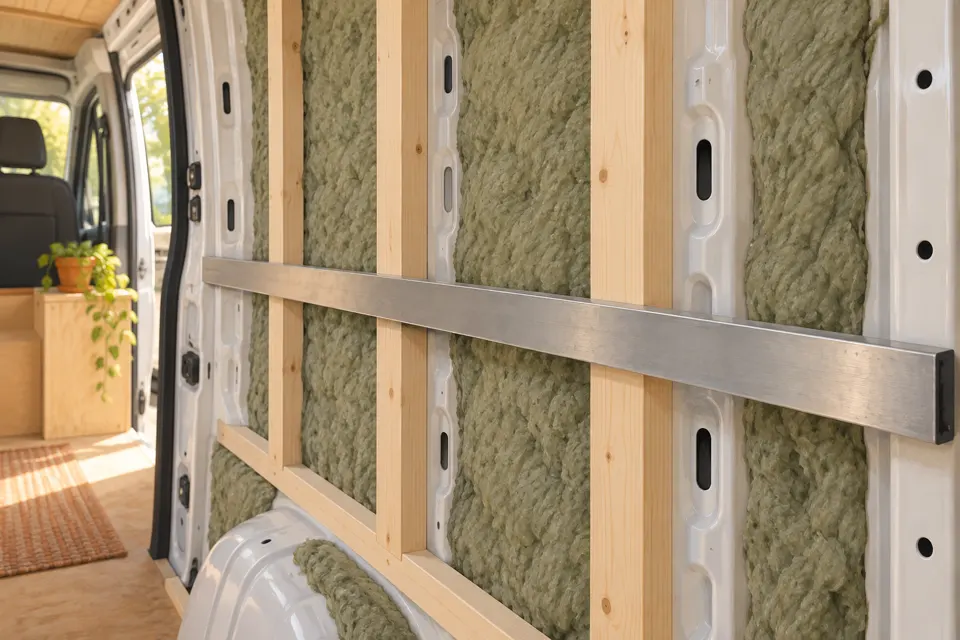
Battens provide somewhere for the lining to attach and can help establish a tidy finished face. Their size, arrangement and fixing method depend on the vehicle and chosen panels. Do not build a timber frame simply because another van used one.
Use sound, suitable timber or a designed backing system. Trial-fit the pieces, identify the intended attachment points, then check the faces with a straightedge. A proud piece can leave a visible bulge; an unsupported joint can flex or rattle.
Follow the panel manufacturer’s support requirements, including edges and openings. If a spacer is needed, it should be an intentional, properly secured part of the assembly. Avoid a collection of loose offcuts trapped behind the board.
Where mechanical fasteners are used, confirm the backing thickness, permitted vehicle fixing location and what is behind it. Treat any newly exposed metal as required by the vehicle guidance, and remove swarf. A long screw hidden behind a panel is still a long screw near cables or exterior bodywork.
Bonded backing also needs a specified method: compatible surfaces, preparation, adhesive, bond-line design, curing conditions and temporary support. An adhesive being sold for vehicle use does not make every timber-to-painted-metal joint suitable. Sika’s vehicle-bonding guidance, for example, requires substrate-specific preparation and verification. Follow the selected system rather than copying a generic bead pattern.
Keep the moisture strategy consistent with the insulation stage. Do not crush insulation to pull the lining flat or introduce unplanned gaps and penetrations. Avoid blocking the drainage and service spaces you identified earlier.
3. Make a cardboard template
Cardboard is much cheaper to adjust than your final sheet. Start with a manageable section and build the pattern up with tape where necessary. Mark which face points into the van, its location and an obvious top edge.
- Hold the card at the intended finished lining face.
- Trim gradually around curves, wheel arches and openings.
- Check it with adjacent panels and the planned edge trim.
- Mark support positions and the areas where no fastener should go.
- Remove it and check that its shape will fit on the sheet with the grain or decorative pattern facing the way you want.
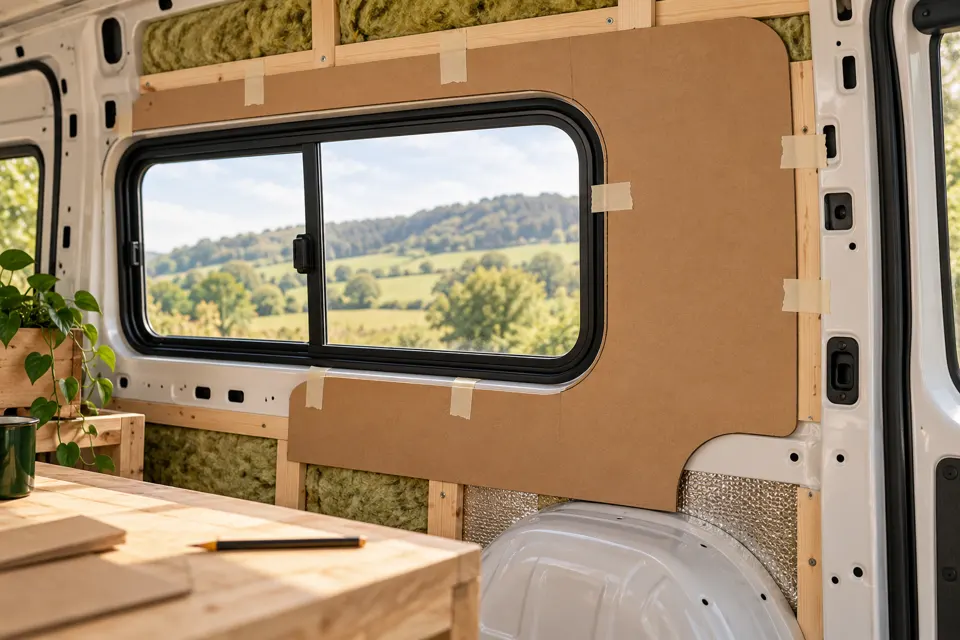
For an awkward curve, hold a small block against the adjoining surface and run a pencil along it to transfer the shape onto the template. Test this on scrap first, keeping the offset consistent. The aim is a useful pattern, not a perfect first cut.
Transfer the outline to the correct face of the board, remembering that turning a template over reverses it. Cut slightly outside a line you intend to refine; you can remove a little more material after a trial fit. Follow the panel and trim instructions for clearances rather than fitting every edge hard against the body.
4. Trial-fit and secure the wall panels
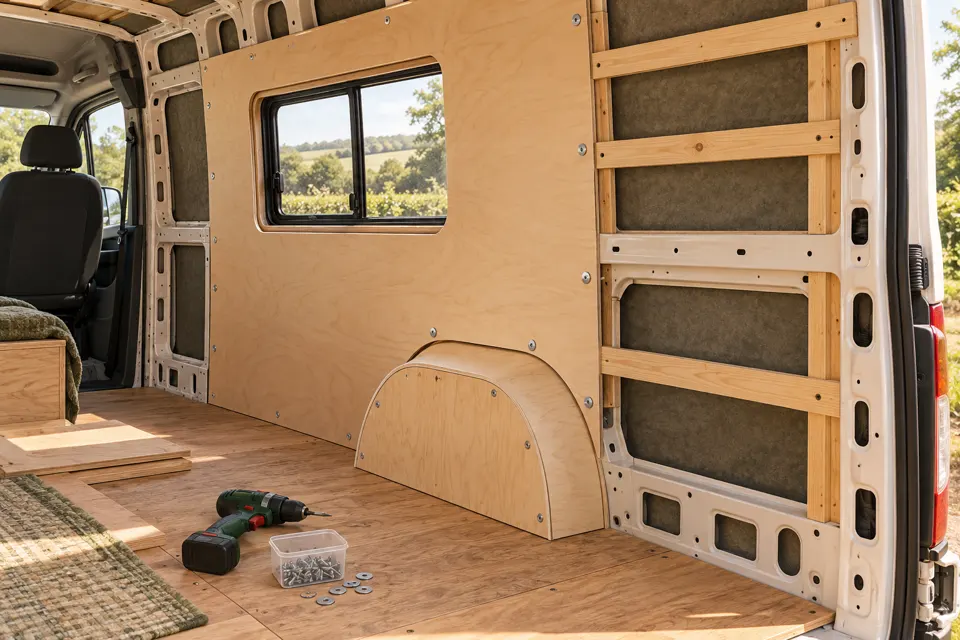
Cut on a stable work surface with the material properly supported. Keep saw work away from the van’s finished surfaces and hidden services. Use a suitable blade and test the cut on an offcut to check the amount of splintering.
Offer the panel up with help if needed. Check the fit without forcing it, then remove and refine the edges. If it only fits when heavily pulled into place, investigate the shape and backing before adding more screws.
- Dry-fit the adjoining pieces together. Check the joint, window reveal and wheel-arch edge as a group.
- Confirm every fixing location. Transfer the backing positions accurately; use your route photographs and measurements. Do not drill exploratory holes through the panel into an unknown cavity.
- Prepare holes as required by the material and fixing system. Avoid splitting edges or pulling screw heads through the face.
- Fit progressively and check as you go. Follow the specified fastener type and spacing. Stop if a panel distorts, a screw spins or a joint loses support.
- Check movement and access. Open doors and windows fully and confirm handles, seals and mechanisms remain clear.
Removable fixings are useful where future inspection is likely. Small finishing washers or compatible trim systems can make them look intentional. Do not permanently hide an access fastener under a bonded decorative cover unless there is another planned way in.
Use appropriate edge protection and finishing for the selected board. Repair a damaged edge properly rather than relying on a decorative strip to hold a broken panel together.
5. Work through the ceiling in manageable sections
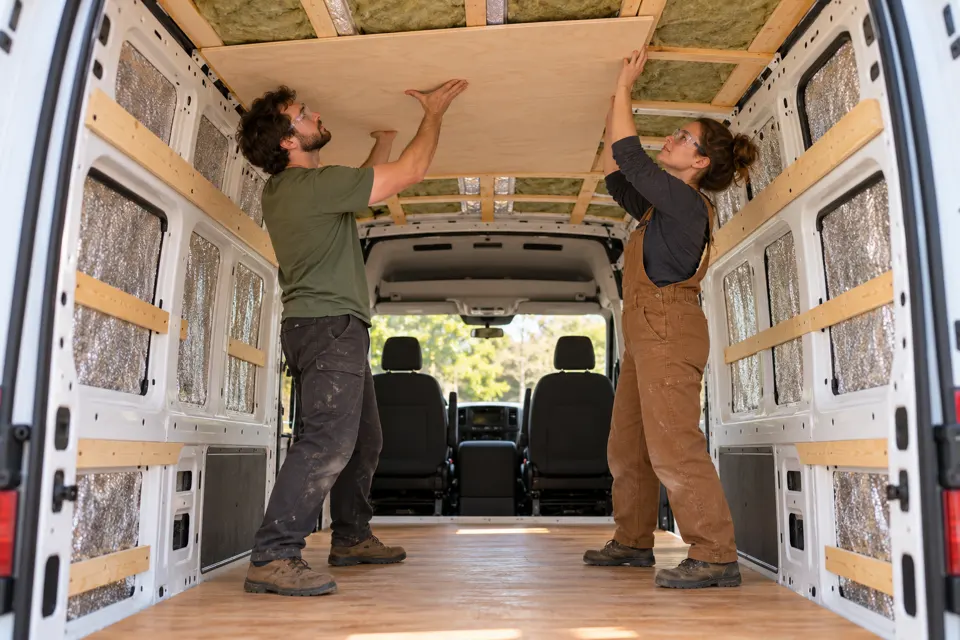
The ceiling needs the same planning as the walls, with extra care over overhead weight. Choose a lining system intended for the job and confirm the support and attachment method. Do not assume a few hidden clips or adhesive dabs are adequate just because they hold the panel still in the workshop.
Set out the rooflight surround, planned lights, fan trim and ceiling joints together. Keep the required rooflight trim depth and appliance clearances. Make a template for the curve at the roof edge rather than forcing a stiff panel into it.
For sheet panels, work in sections you can safely lift and align with a helper. Arrange suitable support before starting and keep the floor clear. Follow the specified fixing sequence. Do not balance a large sheet overhead while reaching for a drill.
For tongue-and-groove boards, establish a straight reference and follow the product’s advice on support, movement allowances and fixing each piece. Check alignment repeatedly so a small error does not build across the roof. Plan a removable final strip or another appropriate access detail where later maintenance requires it.
Have the lighting layout and wiring checked before cutting holes. Use the actual fitting’s cut-out size, clearance and mounting instructions; a pretty round hole is not evidence that a light can safely be enclosed in insulation. Avoid concealing service connections that need access.
Before the last section goes up, photograph the roof routes and backing. Then check the completed ceiling for secure attachment and loose trim before the van is driven.
6. Give windows and doors a neat finish
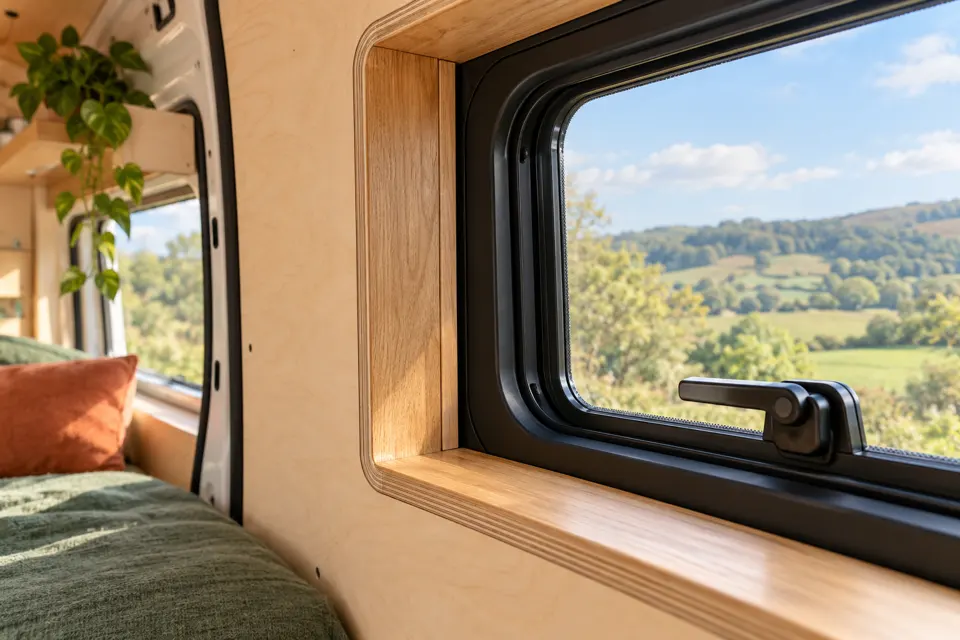
A window reveal is the short finished surface between the wall face and the window frame. It can be made from suitable panel material or a compatible ready-made trim. Work from the actual installed window and its instructions, rather than the dimensions in a sales picture.
Trial-fit each piece, protect cut edges and check the corners together before final attachment. Avoid a sharp projecting edge where someone will lean or climb into bed. Keep the window’s drains, handles, stays and required clearances unobstructed.
Check blinds and flyscreens at the same time. A reveal that looks neat can still stop a blind frame fitting or prevent a handle opening fully.
At the sliding door, check the entire travel of the door and its hardware. Test seals, latches and any removable inner door panel. Added lining must not foul the body as the door slides back. Rear doors also need room for locks, rods and maintenance access.
Use trims compatible with the panel thickness and location. Secure them appropriately so vibration does not turn an attractive edge into a loose strip. At floor level, retain the threshold and drainage details from the flooring stage.
Leave a sensible way back in
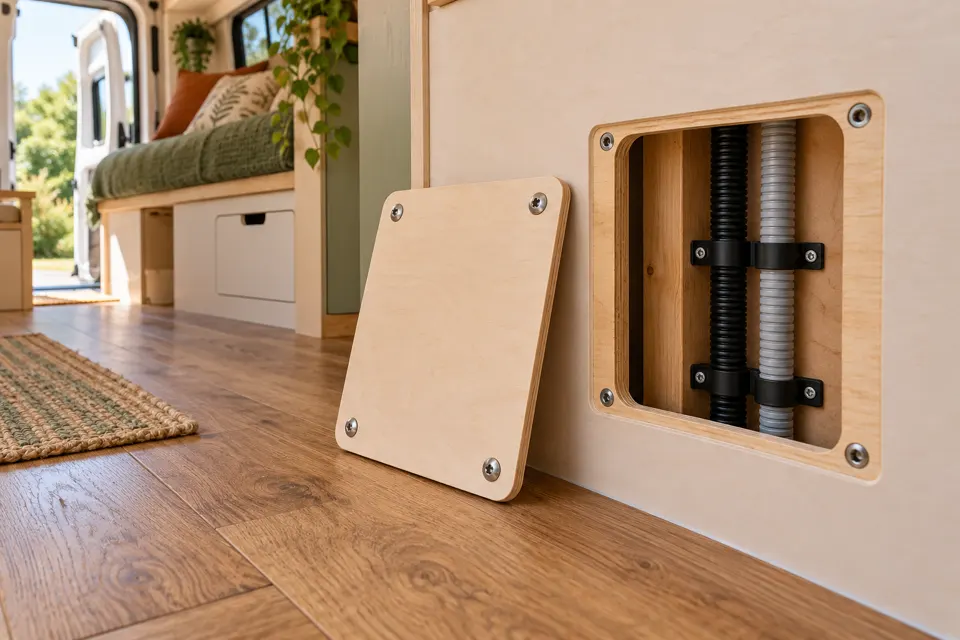
Plan access panels around the work that may actually be needed. Can a hand and tool reach the component? Can the cover still come off once a cupboard or bed is fitted? A hatch hidden behind fixed furniture may be no help at all.
Keep the chosen wiring and pipework arrangement compliant with its own requirements. Protected cable routes still need correct design, installation and checks; a conduit is not a substitute for those.
Save a simple map of hidden routes and no-drill areas. Mark it against fixed features, such as an opening edge, so measurements remain meaningful after the lining is fitted. Before later work, verify what is behind the surface again rather than treating the drawing as a guarantee.
Where a panel must be removed for inspection, use a repeatable attachment method and leave room to manoeuvre it. Avoid filling over those fasteners. Label the back of removable pieces and keep a few matching spare screws and trim offcuts.
Paint, oil, clear finish or lining carpet?
Choose the finish for the material, expected wear and location. Ask the coating supplier about the actual panel and follow its preparation and curing instructions. A test piece can reveal patchiness, grain colour and adhesive staining before you commit to a whole wall.
For plywood, remove splinters and dust, then use a compatible primer and finish where specified. WISA’s plywood guidance stresses preparation and choosing paint suitable for the intended use. Treat exposed cut edges as the selected board and coating system requires. A decorative finish does not turn plywood into a shower enclosure.
Finishing accessible faces and edges before installation can be easier, but keep bonding surfaces compatible with the attachment system. Allow the specified drying and curing time, ventilate as instructed and protect the new surface during fitting.
If using carpet, confirm both the carpet and adhesive are suitable for the vehicle environment and substrate. Practise on an offcut, then plan seams and corners. Keep glue away from service components, window seals and moving hardware. Follow the product safety instructions; a closed van is a poor place to build up fumes.
Leave wet-room waterproofing and areas around heat-producing appliances to their complete specified systems. Do not assume a wipe-clean panel, varnish or carpet will provide waterproofing or fire protection.
Tools and materials to have ready
| Job | Useful items |
|---|---|
| Setting out | Cardboard, masking tape, pencil, tape measure, straightedge and a small scribing block. |
| Cutting and refining | Suitable saw and blade, stable supports, clamps, sanding block and a small trial piece. |
| Backing and fitting | Specified backing material, correct fixings and drill bits, driver and any required bonding system. |
| Finishing | Compatible edge treatment, primer/finish or lining covering, appropriate trims and application tools. |
| Protection and clean-up | Suitable dust extraction, eye/hearing protection and respiratory protection selected for the task; protection for floor and glass. |
Control wood dust at source: use suitable on-tool extraction, a separate cutting area and the protective equipment needed for the task. HSE recommends M- or H-class extraction for this work and suitable respiratory protection where required; tight-fitting masks need a proper fit. Short cutting jobs can still create harmful dust. Vacuum appropriately rather than blowing it through the van. Follow the tool and material safety instructions.
Quantities, weight, time and rough budget
Measure the actual faces you intend to cover, then make a cutting layout using the supplier’s sheet or board dimensions. Area alone can understate how much you need: curves, grain direction and large offcuts affect the number of sheets. Do not subtract every window opening if the cut-out cannot be reused elsewhere.
For a simple arithmetic example, two wall faces averaging 3 m long by 1.7 m high give 10.2 m² before openings and other details. A 3 m by 1.7 m ceiling adds 5.1 m². Those figures are only examples, not dimensions for your selected van. Plan doors, wheel-arch covers, cab transitions and reveals separately.
Use the actual product’s weight per sheet or per square metre. For example, 15 m² at a hypothetical 3 kg/m² is 45 kg before battens, trim, adhesive and fixings. That is a weight calculation, not a recommended material or a payload approval. Include the complete assembly in your build weight records.
| DIY planning allowance | Illustrative amount |
|---|---|
| Backing and lining fixings | £60–£150 |
| Wall and ceiling boards | £180–£450 |
| Trims, edge treatment and finish | £70–£180 |
| Adhesives and consumables | £30–£80 |
| Example materials total | £340–£860 |
These are CamperSteps editorial allowances, not checked supplier quotations. The total excludes insulation already budgeted, tools, labour, electrical work, leak/body repairs and separately designed furniture anchoring. Premium decorative sheets or specialist trim can move it substantially. Keep each item in one budget category so you do not count backing or adhesive twice.
Allow several working days across planning, templates, trial fitting and finishing, with additional drying or curing time. A first attempt often takes longer around windows and the cab than across the large flat areas. Completing one panel neatly is useful progress; there is no need to finish the whole van in one weekend.
Common mistakes worth avoiding
- Covering unfinished first-fix work. Check and record hidden services before closing the surface.
- Letting every joint land wherever the sheet ends. Arrange the sheet layout around proper support.
- Pulling a poorly fitting panel flat with extra screws. Recheck the template, backing and material choice.
- Ignoring finished width and height. Recheck bed length, cabinet clearances and standing room.
- Using lining screws to hang a loaded cupboard. Furniture restraint needs a suitable structural attachment design.
- Making every panel permanent. Preserve access where inspection or servicing requires it.
- Trimming away door or window clearance. Test full movement before calling the job complete.
- Hiding damp behind a smart surface. Find and fix the cause before lining.
Before moving on to furniture
- The shell and openings are dry, with relevant leak checks completed.
- Hidden services have had the relevant installation checks and their routes are recorded.
- Required inspection and maintenance access remains usable after the planned furniture is fitted.
- Backing, panel edges and joints are supported and secured for the selected system.
- Ceiling panels, cladding and trims are secure before travel.
- Doors, windows, blinds, latches, seals, drains and ventilation remain clear.
- Heat clearances and any specialist wet-area construction are accounted for.
- Cut edges and surfaces are finished as required and curing is complete.
- Heavy furniture attachment points are planned separately from the decorative lining.
- Finished dimensions, material costs and assembly weight have been recorded.
You now have the surfaces that the furniture will sit against. Keep the route photos and templates, clear away the offcuts, and recheck your bed and kitchen layout against the finished space.
Instructions and further reading
Original CamperSteps writing and illustrations. The fitting sequence and planning examples are general editorial guidance; the actual materials, fasteners and vehicle need their own instructions and any necessary competent design. Illustration details are not dimensional or structural specifications.
- Ford Pro: conversion resources and Body and Equipment Mounting Manual requirements—use the correct conversion guidance for your own make, model and year.
- Sika: vehicle-bonding preparation and compatibility guidance—an example of why a bonding method needs specifying, not a recommendation that this professional-use product suits every DIY joint.
- WISA: painting and handling plywood.
- HSE: controlling dust when cutting and sanding wood.
- CamperSteps: sound treatment and insulation.
Sources checked 1 November 2026. Prices, areas and weights in the examples are editorial planning figures, not product quotations or confirmed vehicle specifications.