
Stage 7 · A firm foundation for your build
Building your campervan floor
A good floor should feel solid, clean easily and fit neatly around the van’s doors and wheel arches. Plan the complete build-up before cutting plywood: what sits underneath matters just as much as the surface you see.

Three jobs—not just a sheet of plywood
It helps to think about the floor in three parts. The exact arrangement depends on the van, chosen materials and the loads you intend to put on it.
| Part | Its job | What to check |
|---|---|---|
| Support and insulation | Provide the planned support and reduce heat transfer through the floor. | How loads reach the van body; insulation’s suitability; floor shape and available height. |
| Subfloor | Form a stable base for walking and the chosen floor covering. | Board grade, thickness, support spacing, joints, fixing method and moisture protection. |
| Finished surface | Provide the appearance, grip, wear resistance and cleaning surface you want. | Vehicle suitability, adhesive or floating method, temperature limits, edges and maintenance. |
Some conversion systems use supports with insulation between them; others use a designed load-spreading assembly over suitable insulation. Neither is automatically correct just because it appears in someone else’s build. Do not assume a soft wall-lining foam can support a loaded floor.
Dense sound barriers are another possible layer, not a requirement for every floor. If you include one, account for its mass and compatibility with the assembly. The previous sound treatment and insulation guide explains the different material roles.
1. Plan the finished height and the fixing points
Measure the complete height you are adding, not just the plywood. Consider the corrugated steel, any supports or insulation, subfloor, adhesive and final covering. Check the result against headroom, the sliding-door step, rear threshold and access to the cab.
Use a small sample stack where possible. Stand beside it and check the practical effect before ordering a large quantity. A few extra layers can make a low doorway or step awkward.
Mark where the bed, kitchen, tanks, bathroom and other heavy items will sit. Decide how they will be secured to appropriate structure. A cupboard screwed only into a decorative floor surface is not an adequate travel-restraint plan. Seating, seat-belt mounts and other safety-critical attachments need their own approved arrangements.
Plan service penetrations, drainage and access hatches before the floor hides them. Identify the underside of the intended work area, including tanks, fuel and brake lines, wiring and structural members. Obtain the correct vehicle conversion guidance before adding or altering body fixings.
Finish now or later? Some builders protect a completed floor while doing the walls; others fit the final surface later to avoid damage. Either can work when the product and furniture-fixing method allow it. Plan the sequence so you do not trap a floating floor or hide a necessary fixing.
Choose materials for the actual job
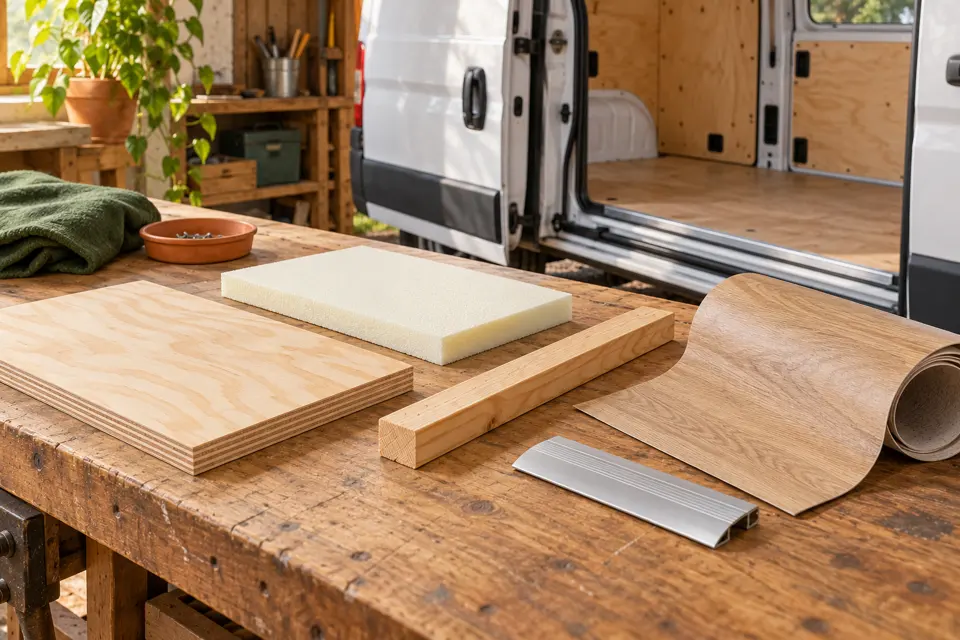
Subfloor board: use a suitable, sound board with a grade and thickness appropriate to the support arrangement and loads. Check the supplier’s intended use and the covering manufacturer’s requirements. Thin lining plywood, visibly delaminating old board or an unknown damaged sheet is not a safe default.
“Marine ply” is not shorthand for a complete waterproof floor. The board’s construction, condition, protected edges and installation still matter. Equally, making a floor unnecessarily thick adds weight and steals headroom. Ask for a suitable specification rather than choosing by a label alone.
Floor insulation: check how the selected product performs in the planned assembly under concentrated and sustained loads. A published compression test figure is not permission to place any cupboard or tank on it. Support and load spreading are part of the design.
Sheet vinyl: can provide a practical wipe-clean surface with relatively few seams. Check the exact material is suitable for the vehicle’s temperature range, substrate and use, and obtain a compatible adhesive specification.
Click boards or planks: are not automatically suitable because they work in a house. Check vehicle use, temperature changes, support, required movement gaps and whether fixed furniture can restrict the floor. Do not pin a floating system beneath units against its instructions.
Carpet or removable mats: can add comfort in selected areas, but consider wet shoes, cleaning and drying. Keep entrances and walkways secure so a mat cannot slide or curl into a trip hazard.
2. Start with a sound, clean and dry shell
Lift any old load floor and inspect underneath before copying its shape or reusing it. Check the rear and side entrances, wheel-arch joints and old fixing holes for rust, water tracks and damage. Complete necessary repairs and allow protective coatings to reach their specified cure stage.
Remove grit, loose screws and swarf from the floor corrugations. Clean by a method compatible with the paint and any later adhesive. Do not bond to grease, failing paint, damp seams or uncured coatings.
Confirm existing plugs, drains, equipment openings and mounting points before covering or closing anything. An unexplained hole is not automatically redundant. Record anything you need to reach later and plan a suitable access detail.
Check the floor shape with a straightedge and understand where the assembly will actually bear on it. Do not compensate for an unstable support arrangement with random soft packing or by forcing a board down with screws.
3. Make a template before cutting the board
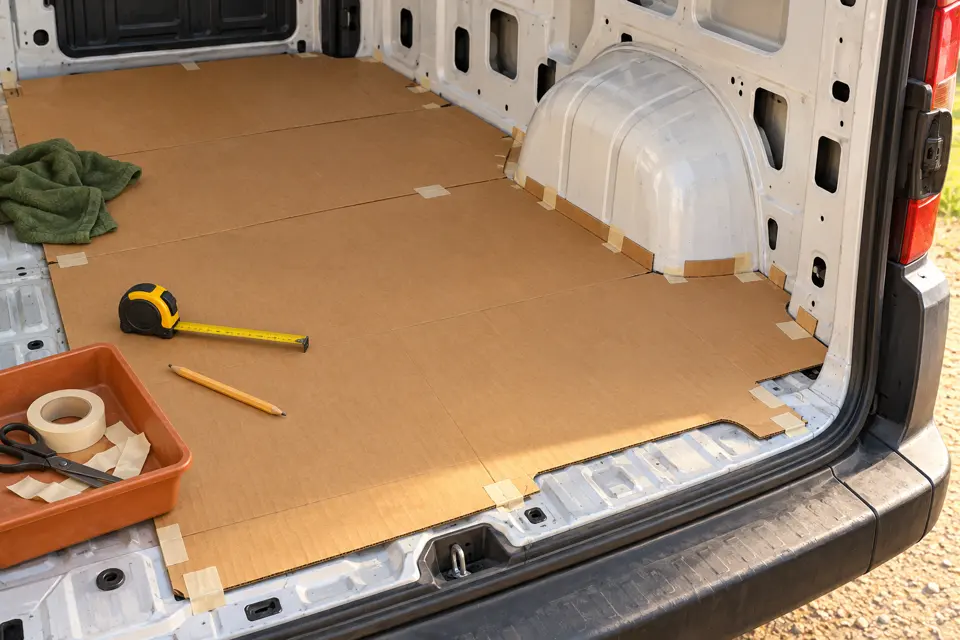
An old floor can be useful as a starting template if it was a good fit. Check it against the actual van, changed thresholds and any new layout. Do not copy old damage, unexplained holes or poor clearances.
For a fresh template, join manageable cardboard pieces with tape and work around the wheel arches, pillars and door openings. Mark the front, top face and centreline so pieces are not accidentally mirrored when transferred to plywood.
- Check the template sits flat and reaches the intended edge—not underneath a door seal or moving part.
- Allow the clearances and movement gaps required by the chosen assembly and materials.
- Plan sheet joints and make sure their support arrangement is defined.
- Mark necessary access points and known fixing locations.
- Transfer the template to the board, then check orientation and dimensions again before cutting.
Cut on a supported work surface using a suitable tool and dust control. Do not use the van’s metal floor as a cutting bench or cut over hidden services. Trial-fit the cut panels before applying adhesive or final fixings.
4. Fit the chosen support and insulation assembly
Follow the support layout appropriate to your floor design. Where battens or other supports are used, they need a sound bearing and attachment arrangement. Where insulation takes load, the complete assembly needs to be suitable for it. There is no universal batten spacing that suits every board and load.
Consider joints and concentrated loads, not just the middle of a clear walkway. A board edge that flexes every time someone steps on it can later damage the floor covering. Tanks and furniture require planned support and restraint.
Fit insulation accurately without forcing it into a smaller thickness than intended or leaving it to prop up an unsupported joint. Keep drainage, access and designed service spaces clear. Use adhesives, isolation strips or joint treatments only where they are compatible with the system.
Avoid creating unnecessary new holes in the vehicle. If mechanical fixings are part of the agreed design, identify safe locations and specify the correct fasteners, depth control, corrosion protection and sealing. Do not drill or drive screws blindly through the floor. Adhesive fixing also needs a proper substrate and application specification; a generic tube of sealant is not a universal structural adhesive.
5. Trial-fit, protect and secure the subfloor
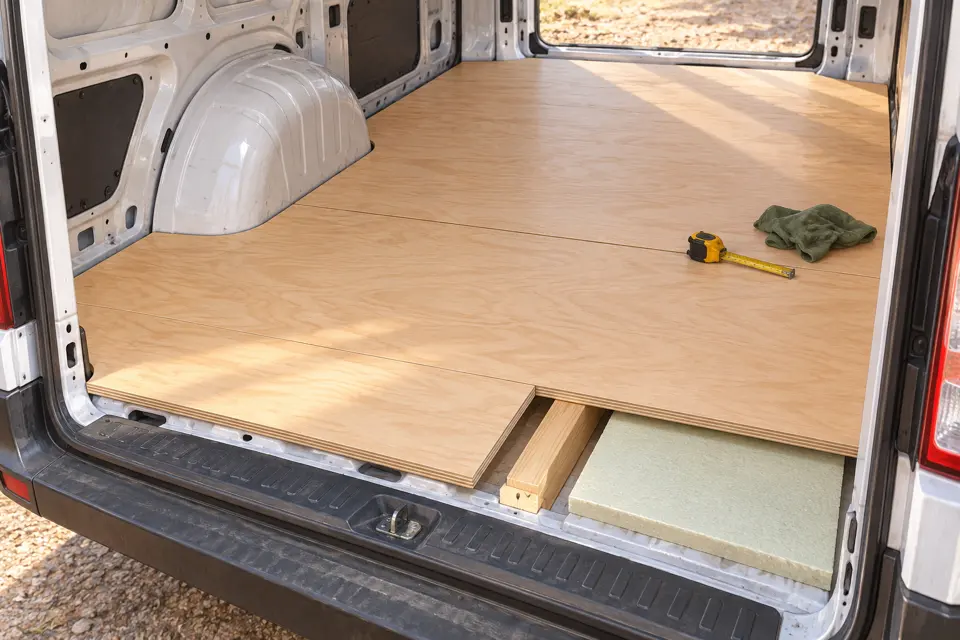
Lay out the boards without final fixing and check the whole fit. Look for rocking, unsupported edges and unwanted contact with the body, door seals or mechanisms. Confirm the planned movement allowances and check that the joint layout works with the chosen covering.
Protect cut edges, holes and any other surfaces as required by the board and flooring system. If sealing plywood, use a compatible product and allow it to cure. A sealer that protects timber but prevents the next adhesive from bonding is not a complete solution. Check both suppliers’ requirements.
Secure the subfloor by its specified method. Fixings should be appropriate for the substrate, positioned correctly and finished so they do not damage the covering. Do not drive a screw farther simply to pull an unsupported sheet flat.
Check panel joints, screw heads and surface imperfections against the floor covering’s preparation requirements. Thin vinyl can reveal a ridge or depression underneath. Any smoothing or patch material must suit the board, vehicle conditions and adhesive; do not automatically use household filler.
Before closing access, photograph the support layout and fixing points. Keep a simple record of where later screws must not go. If a defect appears during trial fitting, correct it now rather than hoping the final surface will hide it.
6. Fit the finished floor covering
Read the exact covering instructions before cutting or opening adhesive. Confirm the substrate, storage/acclimatisation conditions, fitting temperature, adhesive, application tool and permitted loading time. A cold roll brought straight from storage may not behave like a conditioned product.
Clean the prepared subfloor thoroughly. It should be dry, stable and suitable for the bond. Protect it from sawdust and wet footwear while you work. Check the pattern direction and dry layout before committing to the cut.
For a suitable sheet-vinyl system
- Measure and plan the sheet so seams are minimised where practical, allowing sensible material for careful trimming.
- Let the material relax or condition as the manufacturer requires.
- Trial-position it, checking doorways, wheel arches and any pattern alignment.
- Apply the specified adhesive with the correct method and observe its working time.
- Fit and roll the material as instructed to achieve contact and remove trapped air.
- Finish edges, seams and penetrations using the specified details.
Transport-flooring instructions are a useful example of why the subfloor, adhesive and covering must be considered together. They are not a licence to use the same adhesive, temperature or rolling method for every vinyl product.
For a permitted click or floating system
Follow its own support, movement and trimming requirements. Decide how fixed furniture, thresholds and service penetrations will be handled without preventing necessary movement. If the manufacturer cannot confirm the intended vehicle use and installation, choose a suitable alternative rather than copying a domestic-room method.
Allow the required period before walking heavily, moving tools over the floor or fitting furniture. Protect the finished surface with clean, non-damaging coverings while other work continues; grit trapped under protection can scratch it.
7. Finish the doorways and exposed edges
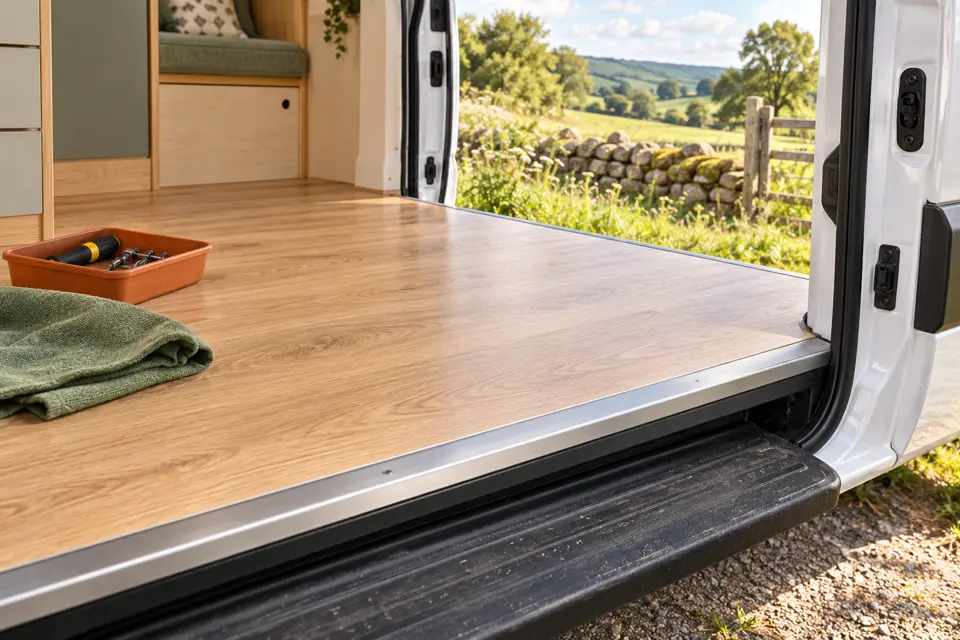
Check the finished floor at the side and rear doors with the doors fully open and closed. Allow for seals, latches, the step and any removable trim. A raised edge or poorly secured strip can catch a shoe even when it looks small in a photograph.
Use an appropriate edge or threshold detail to protect exposed board and covering. Trim needs a suitable fixing arrangement that does not damage hidden services or trap the door seal. Keep required drains and access usable.
At service openings, protect the cut edge and use suitable sleeves, seals or access covers for the actual service. Do not run an unprotected cable through a sharp metal edge or treat a floor covering as a shower-tray waterproofing system.
Inspect the first few times the van is used. Check for lifting edges, moving trim, squeaks and signs of water tracking into the assembly.
Moisture: wipe-clean is not the same as watertight
A vinyl surface may resist spills, but water can still enter at seams, thresholds, penetrations or underneath furniture. A floor is only as water-resistant as its complete detailing. The board below can remain damp even when the top looks dry.
Deal with leaks at their source and dry out any affected area before enclosing it. Do not add an arbitrary plastic sheet beneath everything as a substitute for a coherent moisture-control plan. Think about the floor together with the walls, insulation, ventilation and likely wet areas.
Plan a proper shower/wet-room system separately, including its support, waterproofing and drainage. Keep plumbing joints and tanks accessible enough to inspect. Use a removable entrance mat that can be dried and cleaned, and do not leave wet coverings sitting on the floor for days.
If you notice swelling, a damp smell or a recurring soft patch, investigate underneath. Adding another layer over damage postpones the repair and makes it harder to reach.
Tools and materials to have ready
| Job | Useful items | Remember |
|---|---|---|
| Planning and templating | Cardboard, masking tape, tape measure, pencil, straightedge | Mark orientation and check door clearances. |
| Subfloor work | Suitable board, planned supports, appropriate cutting tools, clamps and dust control | Board and support choices form one load-bearing assembly. |
| Protection and fixing | Compatible coatings, specified adhesive/fasteners, appropriate applicators | Check cure conditions and what lies behind any fixing. |
| Finished surface | Chosen covering, compatible adhesive/underlay if specified, roller and trimming tools | Use the product’s installation method, not a generic recipe. |
| Doorways and access | Suitable trim, access covers and service-edge protection | Keep drains, seals and moving parts functional. |
Use suitable eye, hearing and respiratory protection for the cutting and dust involved, and follow coating/adhesive safety data. Keep sharp tools controlled and work on a stable bench. Borrow or hire suitable tools when that makes more sense than buying them for one stage.
Quantities, time and budget
Start with the model-based floor estimate in your plan. Before ordering sheets and covering, measure the actual finished outline, plan joints and check roll/sheet sizes. The area you need to buy can exceed the area of the floor because of width, cut-outs and pattern direction.
For example, a hypothetical 3 m × 1.8 m clear rectangle is 5.4 m², but you cannot assume one 5.4 m² offcut will have the right shape. Check the usable width and length, door recesses and the trimming allowance. Allow for sensible offcuts rather than simply ordering twice as much.
Remember the weight of the board, supports and any dense acoustic layer as well as the covering. Use the actual product masses and quantities. Plan the floor with the rest of the build’s payload and furniture loads in mind.
| Example planning category | Editorial materials allowance |
|---|---|
| Support materials and suitable floor insulation | £80–£180 |
| Suitable subfloor board | £80–£180 |
| Practical finished covering | £60–£180 |
| Compatible consumables, fixings and edge trims | £40–£100 |
Those categories total roughly £260–£640. These are broad editorial estimates, not current supplier quotes or a complete kit for a particular van. Tools, labour, body repairs, engineered mounting arrangements and additional specialist layers are separate. Material grade and vehicle size can move the total outside this range.
Allow time for planning, trial fitting, coatings and adhesive curing as well as the cutting itself. Work in stages if needed. Record actual purchases against your plan’s flooring rows and avoid adding this guide’s example total on top of the same selected materials.
Common mistakes to avoid
- Ignoring total height: check every layer against doors, steps and headroom.
- Copying another van’s support grid: loads, board and vehicle structure may differ.
- Leaving unsupported joints: solve movement before fitting the covering.
- Assuming any insulation can take floor loads: check the complete assembly.
- Sealing timber without checking the next adhesive: compatibility matters.
- Drilling blindly: identify structure and hidden services first.
- Trapping a floating floor under fixed units: follow its movement requirements.
- Leaving raw doorway edges or loose trims: entrances need a durable, safe finish.
- Calling the whole floor waterproof: inspect seams and penetrations and manage spills.
Your checkpoint before fitting furniture
- The shell is dry, repaired where required and protected before enclosure.
- The support, insulation and subfloor arrangement suits the intended loads.
- Joints and edges are stable; required movement allowances are preserved.
- Coatings, adhesives and the covering form a compatible system with cure time observed.
- Doors, steps, seals, drainage and access points still work properly.
- Service routes and fixing points are documented.
- Bed, kitchen, tank and other furniture restraints have appropriate mounting plans.
- The final surface is protected for the remaining work.
This is a planning checkpoint, not structural or installation certification. Once the floor is sound and protected, you can continue with walls and ceiling, using the support and service routes already planned.
Instructions and further reading
Original CamperSteps writing and illustrations. Follow your vehicle manufacturer’s conversion guidance and the current documents for the actual board, insulation, adhesive and covering. The pictures do not specify dimensions, load ratings or fastener layouts.
- Altro Transport: installation and maintenance guide—an example of vehicle-flooring substrate and fitting requirements.
- Forbo: selecting and working with flooring adhesives—covering, adhesive and substrate compatibility.
- Ford Pro: conversion guidance and body-manual requirements—obtain the appropriate guidance for your own make and model.
- HSE: safe motor vehicle repair.
- CamperSteps: sound treatment and insulation.
Sources checked 1 November 2026. Costs and dimensions in examples are editorial planning allowances; no assembly shown here is a vehicle-specific approved floor design.