
Stage 14 · Fresh water in, waste water out
Planning and fitting your campervan water system
A useful water system does not have to be complicated. Start with the jobs you want it to do, choose storage you can fill and empty comfortably, and leave the pump and connections accessible. A simple cold-water sink can be a sensible starting point; hot water and a shower add their own requirements.

1. Decide what the water system must do
Start with everyday uses: drinking water, food preparation, washing hands, washing up and perhaps showering. Decide which jobs need a fitted supply and which you are happy to manage another way. A full conversion does not require every possible appliance.
Think about how you will refill and empty the van. Larger storage can reduce refill stops, but it also takes space and adds weight. Smaller containers can be easier to remove and clean, provided you are comfortable handling them when full.
Use an approximate allowance to begin planning, then refine it from your own routine if useful. You can try a washing-up session with a jug to understand your usage, but you do not need to measure every splash before choosing a starting layout. Keep some flexibility rather than treating an estimated capacity as a promise of days away.
| Starting question | Why it matters |
|---|---|
| Cold water only, or hot too? | Hot water adds a heater, compatible components, installation and drain-down requirements. |
| Sink only, or shower as well? | A shower changes supply, drainage, storage and waterproofing needs. |
| Removable containers or fixed storage? | This affects filling, cleaning, restraint and the space you must keep accessible. |
| Inside or under the van? | Consider space, frost exposure, vehicle clearance and the permitted mounting arrangement. |
| How will waste be managed? | Plan collection, monitoring and an appropriate disposal routine from the start. |
List the actual selected products where known. Mark undecided items clearly and confirm their requirements before cutting openings or permanently fitting furniture. Reading this guide does not select equipment or change a saved plan.
Removable containers or fixed tanks?
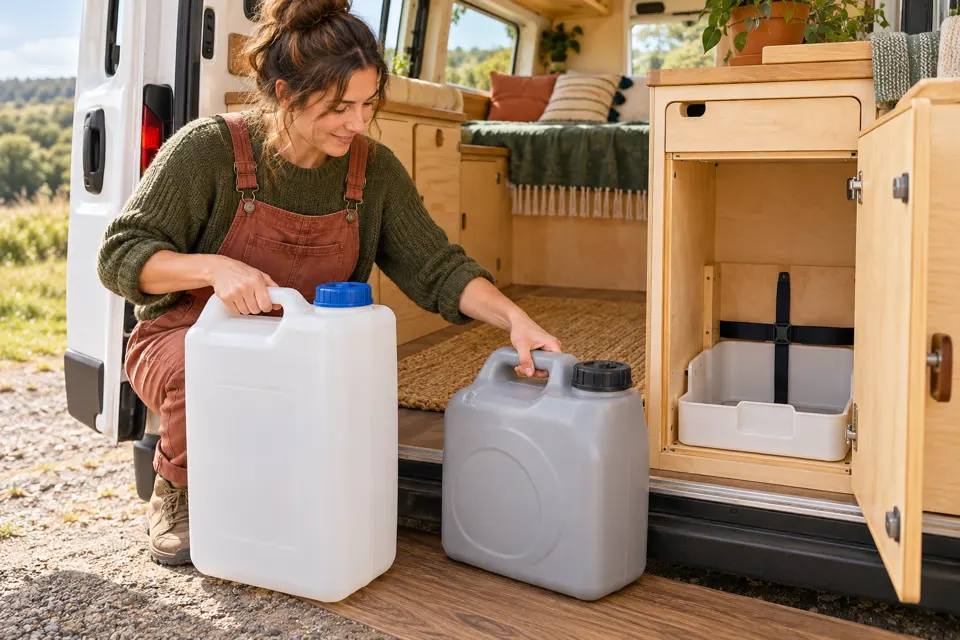
Removable containers can suit a simple sink system and keep the initial build manageable. Check the full container weight, handle access, cap clearance and how the hoses disconnect without spilling. Make the fresh and waste containers easy to distinguish.
Fixed tanks can offer more capacity and fewer daily movements. They need a designed installation with suitable support, filler, venting, drainage and inspection access. The tank’s stated capacity is only part of the installation envelope.
Choose every component in contact with fresh water for its intended potable-water use, temperature and pressure. That includes tanks, hoses, seals, fittings and any cleaner or treatment product. A container looking clean, or being sold as general storage, does not confirm it is suitable for drinking-water storage.
Check whether the tank can be cleaned and inspected in its fitted position. A wide lid is less useful if the bed frame sits immediately above it. For removable containers, check that the replacement cap and seals remain available.
A model-specific underslung tank may help with packaging, but still confirm the exact vehicle generation, wheelbase, equipment and mounting instructions. Do not assume a kit listed for one van will fit every annual version.
2. Check the whole tank envelope and loaded weight
Use a cardboard mock-up to check the tank position. Include the filler and vent connections, lid, outlet fittings, drain valve, insulation if planned, and space for your hand and tools. Check the route for removing it later.
Try the layout with the actual bed and kitchen footprint. Do not use the last available gap if it leaves the tank inaccessible or forces awkward pipe runs. Keep water equipment away from unsuitable electrical or heat-exposed locations.
For an underfloor position, have clearance, mounting points and nearby vehicle systems checked. Exhausts, moving parts, brake/fuel lines, jacking points and ground clearance all matter.

Water adds approximately 1 kg per litre. As a planning example, 40 litres of fresh water and 20 litres of retained waste water add about 60 kg before tanks, heater contents, pump and fittings. These are example quantities, not a recommended capacity or payload approval.
Consider the combinations you may actually carry, including refilling fresh water before emptying waste. Avoid assuming that one tank will always be empty. Include the complete system in the conversion’s weight and axle-load checks, with the tank position considered as well as the total mass.
Plan access to a level indication or another reliable way to check capacity. A concealed opaque tank can be difficult to judge until it overflows or the pump runs out of supply.
3. Support and restrain tanks for travel

Use the tank maker’s support requirements and an attachment arrangement appropriate to the vehicle and filled load. A large tank should not hang from its pipework or be held only by a decorative cupboard front.
Agree the base support, restraint, permitted fixing locations and protection against rubbing. Do not over-tighten a strap in a way that distorts the tank. Fittings and lids also need the clearances specified by the manufacturer.
Removable containers need suitable travel retention too. Check the tray, strap or bracket with the actual container and its handle. Keep it secure while allowing practical removal; a container trapped behind permanent pipework is not meaningfully removable.
Before drilling, identify what is behind and beneath the proposed location and follow the vehicle conversion guidance. Have uncertain structural attachments designed by a competent converter. Seal and protect permitted penetrations as required rather than relying on a generic screw or bracket pattern.
Keep valves and inspection points accessible after nearby storage is loaded. Photograph the installation and retain the mounting instructions with your build records.
4. Plan pump access and compatibility
Choose the pump with the complete system. Submersible and external pressure-pump arrangements have different installation and control requirements. Confirm the actual voltage, flow, pressure, duty and connections rather than selecting by litres per minute alone.
For an external pump, trial its position with the strainer and required hose connections. Follow its mounting, orientation, cooling and suction-route instructions. Leave enough room to inspect and clean the strainer and replace the pump.
Use the specified support and flexible connections where required. Do not pull pipework tight against a pump or tighten its mounting in a way that defeats the intended vibration isolation.
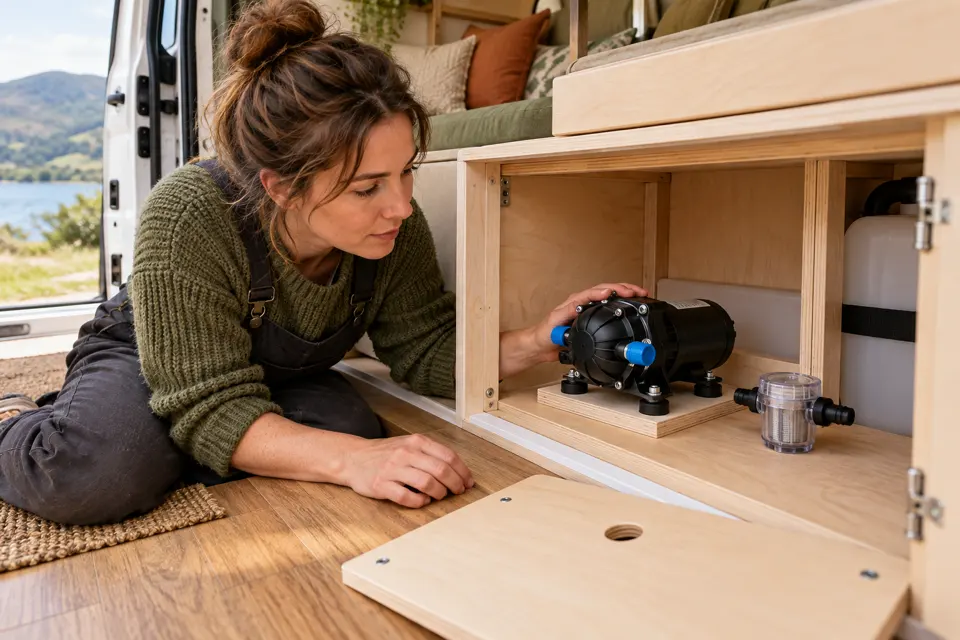
Check the pump’s pressure against the heater and every other component. The pump’s pressure limit or cut-off matters, not just its normal flow. A pressure reducer, accumulator or other device should be included only where the chosen system requires it. Some pumps specifically do not require an accumulator.
Have the electrical supply, switching and protection designed with the electrical installation. Do not copy a wire size or fuse rating from an illustration of another model. Keep an appropriate way to stop the pump accessible.
Follow the manufacturer’s rules for priming and dry running. Repeated cycling, unusual noise or failure to stop needs investigation; do not casually adjust pressure or bypass settings to hide a fault.
5. Choose a compatible pipe-and-fitting system

Match the actual pipe and fitting specifications: outside/inside diameter as relevant, material, temperature, pressure and potable-water suitability. Similar-looking metric and imperial fittings are not automatically compatible.
Draw the route before buying a collection of elbows. Keep it practical to inspect and drain, with bends and support appropriate to the selected pipe. Avoid kinks and tension on fittings, and protect passages through furniture or metal.
Keep the planned route clear of drawer runners, sharp edges, hot equipment and future fixing positions. Record it before closing the panels.
Use the manufacturer’s preparation and assembly method, including any specified inserts, seals, clips or retention. Push-fit and threaded joints do not all use the same sealing method. Do not automatically add tape or sealant to every thread; the wrong method can damage or contaminate components.
Support the pipes using the specified arrangement and leave the required service allowance. Make joints accessible where inspection or maintenance needs it. Do not bury an untested connection behind a permanent panel.
For hot water, confirm the complete route and fittings are rated for the actual operating conditions. Red pipe or a red sleeve alone does not prove a hot-water rating.
6. Plan the sink waste route as carefully as the supply
Check the space below the actual sink for its waste fitting, hose and any specified trap or odour-control arrangement. A deep bowl and waste can take the space originally allocated to a drawer.
For gravity drainage, plan a supported route with appropriate fall and without kinks or unintended low pockets. Agree the required pipe bore, tank inlet and venting for the chosen arrangement. Do not assume a tightly sealed container will drain properly without provision for displaced air.
Keep access for removing food debris and cleaning the waste components. A removable grey container should be easy to disconnect and take out without spilling into the cabinet.
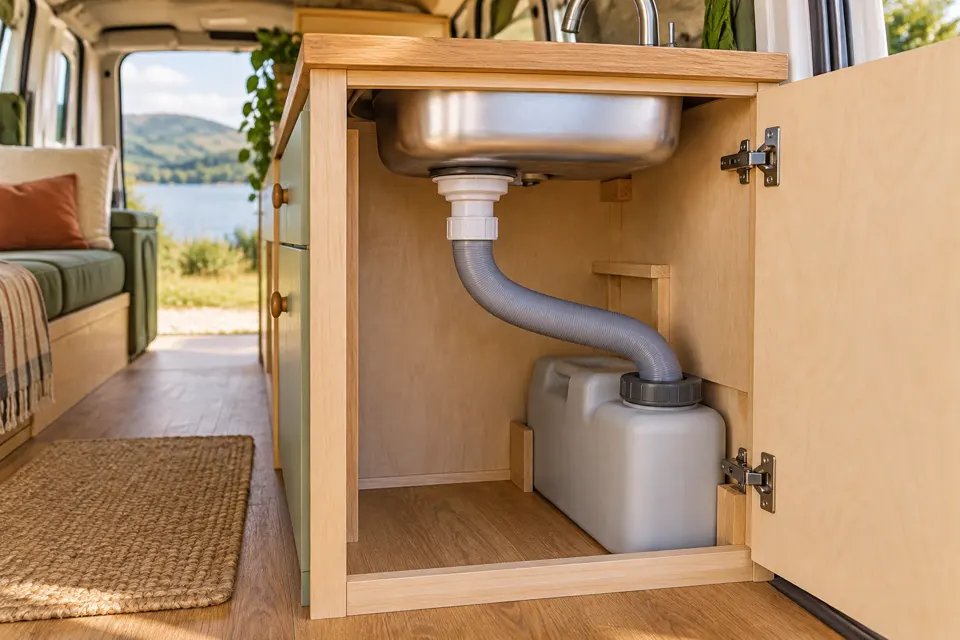
Plan how to monitor and empty the waste before it backs up. Collect grey water and use an appropriate disposal point; do not discharge it onto a pitch, road, watercourse or surface-water drain. Keep fresh-water filling equipment separate from waste-handling equipment.
A shower can need a different waste arrangement depending on tray height and tank position. Do not assume the sink route will also drain a low shower tray. The tray, waterproofing, waste and access need designing together; a pump alone does not make a wet room watertight.
7. Make filling and emptying easy to do cleanly
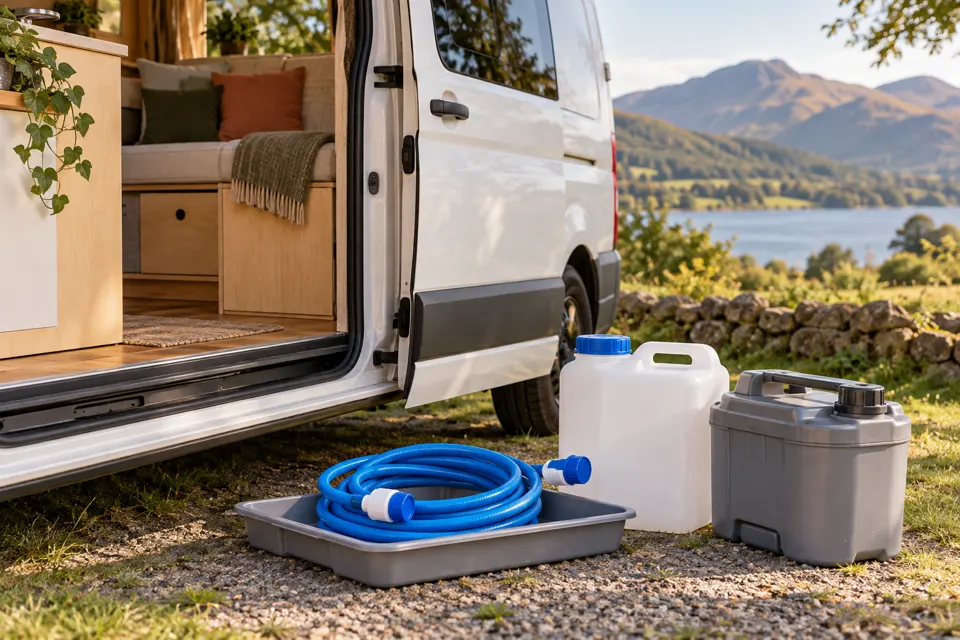
Use a known potable-water source and suitable dedicated filling equipment. Keep hose ends and container openings protected from dirt and store the kit separately from waste items. Do not use a service-point hose for fresh filling if its purpose or cleanliness is uncertain.
For fixed storage, follow the tank and filler instructions for inlet, vent and overflow arrangements. Keep required vents clear and weather/contamination protection appropriate to the installation.
Check the actual filling routine at the chosen position. Can you reach it comfortably and avoid spilling into the van or nearby electrical equipment?
Do not pressurise a storage tank that is not designed for it. A direct connection to a mains supply is a different arrangement from filling a tank; it needs suitable pressure control and backflow protection specified for the actual installation. Have that designed rather than adapting a filling hose by guesswork.
For removable containers, choose sizes you can handle safely when full. Carrying two smaller containers may be more practical than lifting one very heavy one. Keep caps, seals and disconnect arrangements suitable for transport and cleaning.
Adding hot water or a shower
Choose the actual heater before finalising pump pressure and plumbing. Confirm its permitted supply conditions, expansion/relief arrangements, drain-down requirements and service access. Heater installation also includes its own energy supply, clearances and, where relevant, combustion/flue requirements.
Retain the manufacturer’s specified safety valves and a suitable unobstructed discharge route. Do not cap a relief outlet, hold a safety valve shut or fit an improvised restriction to stop a discharge. Have an unexpected discharge or pressure problem investigated.
Use the correct operating instructions for filling, heating and draining that model. Do not assume instructions for a water-only boiler apply to a combined space-and-water heater. Have gas and electrical work completed and checked by appropriately competent people.
For a shower, consider how long the actual fresh and waste capacities will last, how hot water is supplied and how the enclosure dries afterwards. A bigger pump does not solve limited storage, unsuitable drainage or incomplete waterproofing. Keep the option proportionate to how you expect to use the van.
8. Check the system before hiding the joints
Follow the selected system’s commissioning procedure. Check attachments and routes first, then inspect while filling and operating as instructed. Do not improvise a pressure test with compressed air or exceed a component’s rating.
- Confirm the pump, heater, pipework and fittings are compatible and installed to their instructions.
- Check caps, intended valve positions, vent paths and waste capacity before filling.
- Commission and prime using the specified procedure, keeping joints visible.
- Inspect connections, the underside of the sink, tank fittings and surrounding surfaces for leakage.
- Check normal operation at every outlet and the waste route, including pump shut-off where applicable.
- Correct faults and repeat the relevant checks before closing panels.
Do not treat a pump that stops as proof that every joint is sound. Recheck accessible areas after the initial use and after travel, following the manufacturer’s maintenance guidance. Investigate moisture, unexplained cycling, loss of flow or tank movement.
Keep the pump off when the instructions require it for travel, storage, unattended use or servicing. Agree a clear shutdown routine for your system. Before maintenance, isolate the relevant energy sources, allow hot water to cool and relieve pressure using the specified procedure.
9. Plan cleaning into the build
Make the fresh-water system easy to maintain from the start. Keep access to the tank, caps, strainers and serviceable fittings. Choose cleaning equipment and products compatible with the actual potable-water system.
Follow the tank, pump, heater and cleaner manufacturers’ procedures for commissioning, cleaning, contact time and rinsing. Do not assume one chemical or concentration is suitable for every component, and never mix cleaning chemicals.
Keep a simple record of maintenance and any filter replacement required by the chosen product. A strainer mainly protects equipment from debris; do not assume it makes unsafe source water safe to drink.
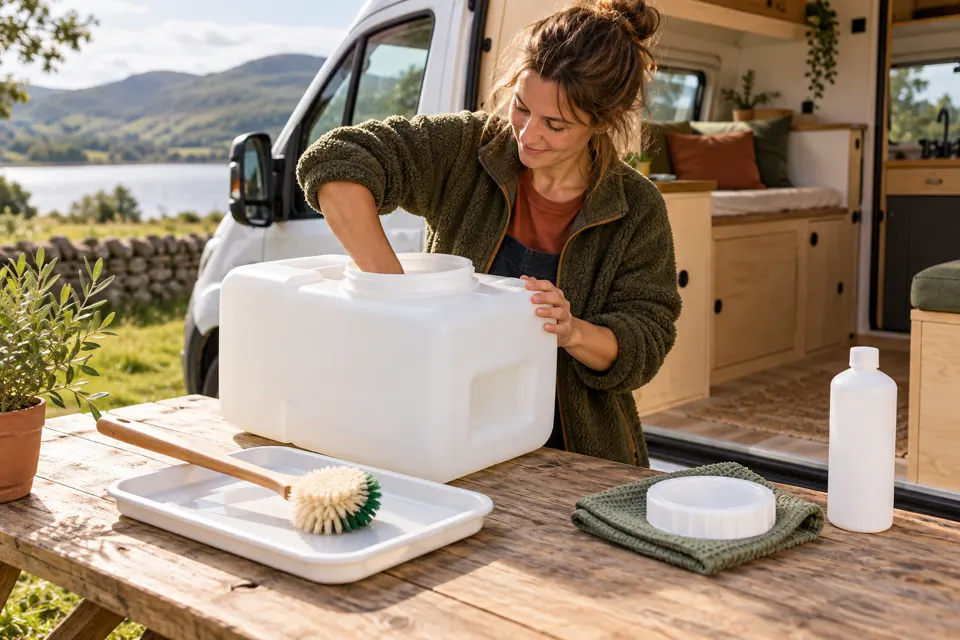
Use and store the system according to its instructions, including after periods out of use. If the source or system condition is doubtful, do not rely on taste, clarity or a basic inline filter as a safety check. Obtain a known safe drinking-water supply and resolve the cause.
10. Leave a practical drain-down route

Plan drain-down while choosing the routes. Follow the actual instructions for the tanks, pump, heater, taps and any shower components. Emptying the main tank does not necessarily empty the rest of the system.
Retain the specified drain and relief outlets and keep them clear. Frost protection needs to address the complete installation, including exposed pipes and waste equipment, not just one tank.
A heater’s frost valve or a layer of insulation is not a blanket guarantee against freezing. Confirm what the selected equipment does and what the owner still needs to do.
Ask for a written winter-storage and recommissioning routine. If any antifreeze product is permitted by the system maker, use only the specified type and method for that potable-water system; never use vehicle-engine antifreeze in it. Do not improvise blowing out a system at an unknown pressure.
Keep the maintenance points reachable after the bed, drawers and storage are loaded. Label the actual valves and record the correct procedure rather than relying on the colour or orientation of an illustration.
Tools and materials
| Job | Useful items |
|---|---|
| Planning | Cardboard, tape, pencil, tape measure, actual component manuals and a route sketch. |
| Storage and restraint | Suitable tanks/containers, specified support and attachment materials, service-access hardware. |
| Supply | Matched pump/strainer where required, potable-water pipe and fittings, specified clips and protection. |
| Waste and access | Suitable sink waste, collection tank/container, vent/drain arrangements and removable panels. |
| Installation and maintenance | Correct tools for the selected pipe/fitting system, compatible cleaning products, clean filling gear and spill-catching materials. |
Do not buy a mixed bag of fittings before choosing the system. Check which dimensions refer to pipe outside diameter, inside diameter or a thread standard, and use the correct adapters where specified. Keep installation instructions rather than relying on appearance.
Time and rough costs
| Simple cold-water sink system | Illustrative materials allowance |
|---|---|
| Fresh and waste storage | £60–£180 |
| Pump and strainer, if used | £60–£150 |
| Pipe, fittings and route protection | £50–£130 |
| Sink, tap and waste fittings | £70–£180 |
| Basic mounting and maintenance supplies | £30–£80 |
| Example materials total | £270–£720 |
These are CamperSteps editorial planning allowances, not supplier quotations. They exclude hot-water equipment, shower/wet-room construction, specialist tank kits or structural attachments, labour, electrical work and tools. A manual-pump arrangement or reused suitable equipment may change the total; a larger fixed system can cost considerably more.
Keep tank costs in the existing water-storage allowance and other parts in their appropriate equipment/build allowances. Check what a kitchen pod, pump kit or installation quote already includes. Do not count the sink and tap again if they are already in your plan.
Allow separate sessions for mock-ups, mounting, routing, commissioning and maintenance access checks. Do the relevant inspection before permanent panels hide the work. Keep manuals, route photos, attachment details and the cleaning/draining routine with your build records.
Before using the system
- The intended uses and fresh/waste capacities are practical for your routine.
- Fresh-water components are suitable for their intended potable-water use and operating conditions.
- The loaded weight, tank support and vehicle attachment have been accounted for.
- Pump pressure, heater limits, pipework and fittings are compatible.
- Required vents, relief outlets and drains are present and unobstructed.
- Pipes are supported and protected from heat, rubbing, movement and future fixing areas.
- Sink and any shower waste reach the intended collection system without leaks or backup.
- Required commissioning, leak and electrical/appliance checks are complete.
- Clean filling gear is separate from waste equipment, with a suitable disposal routine.
- Cleaning, drain-down and service access work with the finished furniture.
- The costs and system weight are recorded without double-counting.
This list supports planning and review; it does not certify drinking-water quality, pressure safety or vehicle fit. Follow the actual equipment instructions and obtain competent help for any part outside your experience.
Instructions and further reading
Original CamperSteps writing and illustrations. The sequence is general editorial guidance, not a universal system drawing. Example components in sources are not automatically the products selected in your equipment list.
- Pentair Shurflo: example RV pump installation and operation manual—mounting, strainer, connection, maintenance and winter-storage requirements are model-specific.
- John Guest: plumbing systems for caravans and motorhomes—choose the actual compatible pipe/fitting system and its instructions.
- Truma: water-heater types and drain-down guidance—use the instructions for the exact heater.
- Truma Boiler: product and maintenance information.
- CAK: tank and vehicle-kit range—confirm the exact vehicle and installation details with the maker.
- Ford Pro: conversion resources—obtain the appropriate body/conversion guidance for your own make, model and year.
Source information checked 2 November 2026. Example prices and quantities are editorial allowances, not catalogue updates or confirmed vehicle specifications. Saved plans, selections and prices are unchanged by this guide.