
Stage 10 · A practical place to cook and wash up
Building your campervan kitchen
Start with a kitchen that makes everyday jobs easy: somewhere to prepare food, a sink you can use comfortably, storage that stays closed on the road and appliances that have the space they need. A simple, well-fitted cabinet run is a good first build.
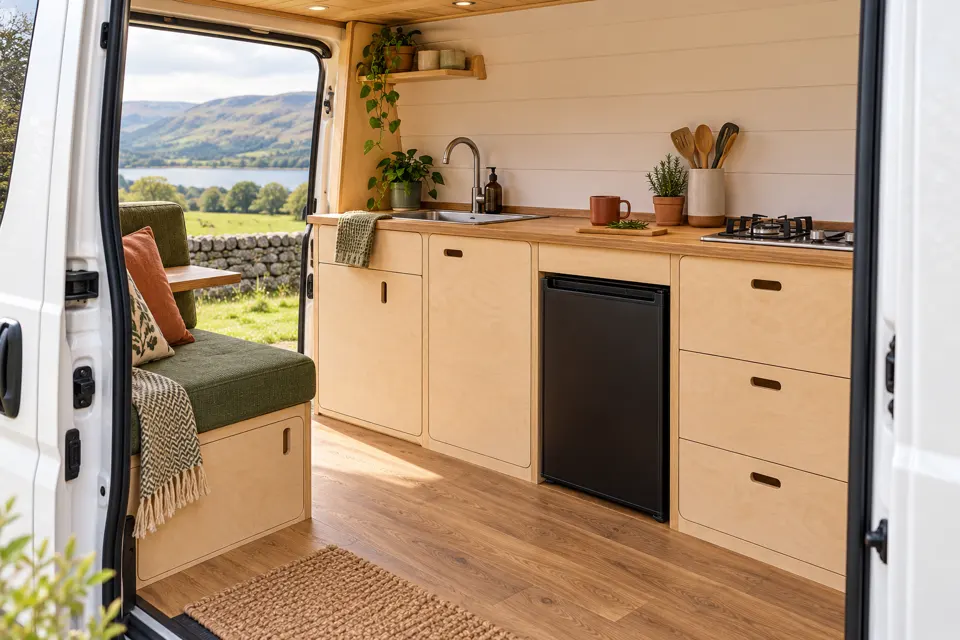
Settle the appliance requirements before cutting cabinets
You can start planning with approximate sizes, but confirm the exact sink, hob and fridge before finalising their openings. Similar-looking appliances can need different cut-outs, clearances, support, ventilation and access. A product’s outside dimensions are only part of the space it needs.
Download the installation instructions for the actual model and version. Make a short list of the cabinet requirements and agree any service routes with the relevant installer before boxing them in. If a used appliance has no reliable identity or instructions, resolve that before building around it.
| Item | What to confirm |
|---|---|
| Sink and tap | Cut-out/template, worktop thickness, bowl and waste depth, tap movement, retaining clips and access underneath. |
| Hob | Vehicle suitability, cut-out, support, heat clearances, ventilation, shielding and installation requirements. |
| Fridge | Required recess and air path, mounting frame, support, door swing, service removal and power requirements. |
| Water system | Space for the chosen pipework, waste route, accessible joints and components, and tank access. |
| Cabinet hardware | Door/drawer clearances, runner dimensions, load suitability and positive travel closures. |
Do not automatically place a fridge or a deep drawer directly under a hob. The required space and protection underneath the hob may conflict with it. Arrange the kitchen as one complete assembly rather than squeezing the last appliance into whatever gap is left.
1. Mock up the working space
Mark the cabinet footprint with masking tape and use cardboard boxes to represent the height and depth. Try standing at the worktop, turning towards the bed, reaching the sink and passing someone in the aisle. The mock-up is for checking space, not supporting someone’s weight.
Try the real saucepan and chopping board you expect to use. Leave a practical preparation area and somewhere appropriate to put things down. A row of sink and hob cut-outs can leave surprisingly little working surface.
Check full drawer and fridge-door movement with the bed made up. Include handles, tap height, lids and the person standing in front of the unit.
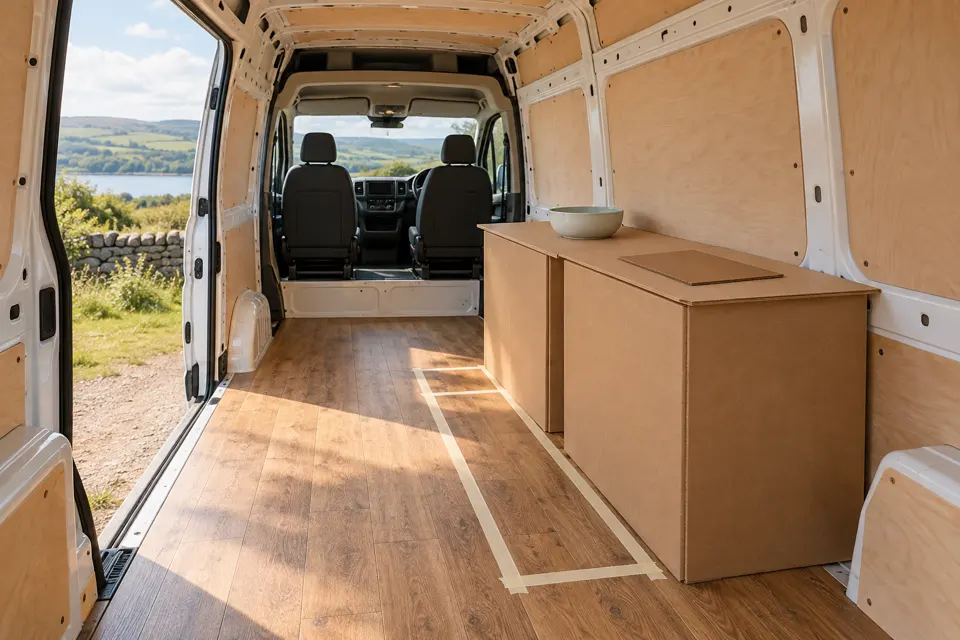
If the kitchen partly covers a sliding-door opening, check the clear section that remains and the actual route in and out. Partial coverage is not automatically a problem, but a drawn gap alone does not confirm usable access, safe escape or door operation. Test the door through its full travel, including handles and mechanisms.
Measure from the finished floor and lining. The side wall may curve or taper, so a cabinet that fits at floor level can meet the wall differently at worktop height. Use templates for irregular edges rather than forcing a square box against the body.
The personal build planner can help compare kitchen positions, but its illustrative footprints and door guides are not exact product dimensions. Confirm the actual cabinet and appliance space before making the cutting list.
2. Choose materials and make a cutting list
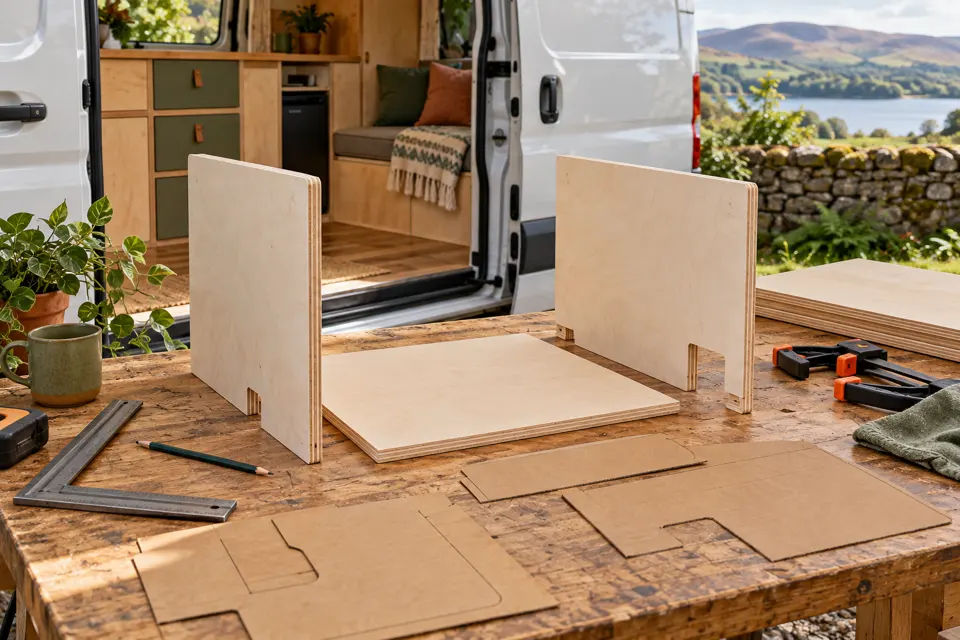
A suitable plywood cabinet can be made as a box, often called a carcass, with separate doors and a worktop. Another approach uses a timber frame with panel infill. Choose a documented construction method you can build accurately and that suits the intended vehicle loads.
Compare the actual panel grade, core, weight and finish. Lightweight decorative plywood may save finishing work, but exposed cut edges and joints still need the correct treatment. General household furniture is not automatically suited to a moving, sometimes damp vehicle.
List sides, bottoms, rails, shelves, backs or bracing, doors, drawer parts and finishing pieces. Account for panel thickness and the way joints overlap. A shelf between two sides is not normally the same width as the outside cabinet dimension.
As a simple arithmetic example, a 500 mm outside width with two 15 mm sides leaves 470 mm between them, before any hardware allowance. These are invented dimensions, not a recommendation for material thickness or a drawer opening. Use the real construction and hardware instructions.
Draw the parts on the supplier’s sheet sizes before ordering. Keep decorative grain running the way you want, allow for the cutting method and use offcuts sensibly. Save a sample for testing finishes and edge treatment.
Choose the worktop at the same time. Check mass, moisture resistance, edge finishing, supported spans and whether its thickness suits the appliance clips and tap. A heavy domestic worktop may use more payload than you want; a thin improvised board may not support the cut-outs adequately.
3. Build square, manageable cabinet boxes
Cut and assemble away from the van’s services and finished surfaces. Support the material properly, use suitable blades and make a trial cut on scrap to check splintering. Label the pieces so matching parts stay together.
Dry-assemble each box on a stable workbench. Check the corners with a square and, for a rectangle, compare both diagonals. Correct the shape before finalising the specified joints; a twisted carcass makes door and drawer adjustment harder.
Include the intended back, rails or bracing. An open rectangle can rack sideways even if it feels solid when pressed down from above.
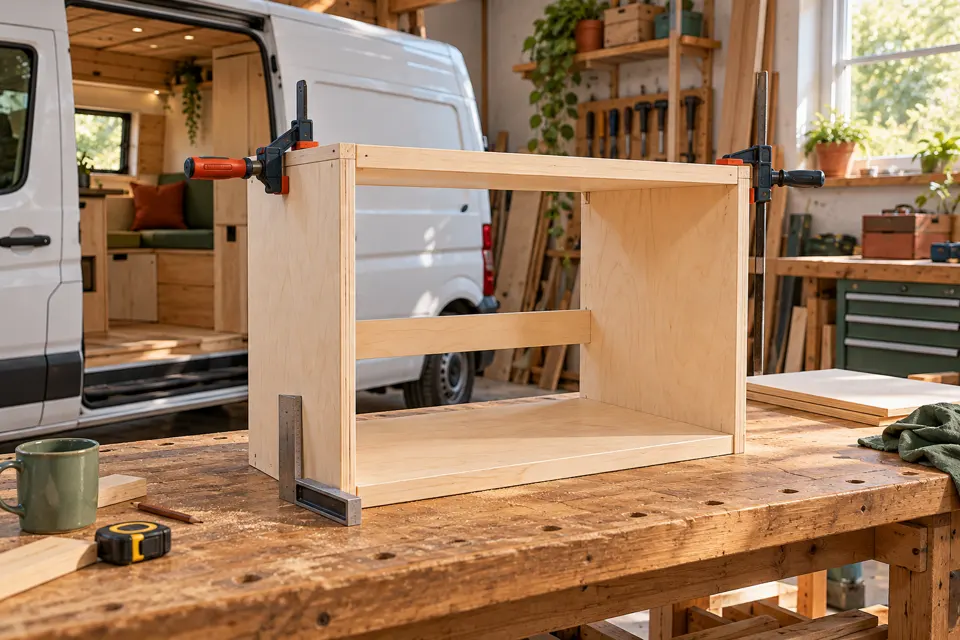
- Check the first cuts. Compare matching parts and verify the finished openings against the plan.
- Trial the hardware. Confirm hinge or runner space before closing an inaccessible corner.
- Make the specified joints. Follow the chosen construction system for fasteners, pilot holes and adhesive, where used.
- Check square again. Clamping and tightening can move the parts.
- Leave access deliberate. Use removable sections where servicing requires them rather than cutting them out later.
Do not rely on an appliance, worktop or decorative door to hold a poorly braced box in shape. Equally, do not add extra partitions without checking the planned ventilation and service space.
4. Trial-fit the run and plan secure attachment
Bring the boxes into the van in manageable sections. Protect the floor and check their bearing points, clearances and alignment together. Use an agreed finished reference, such as the supported worktop plane; a spirit level reading on a sloping driveway does not by itself establish the cabinet layout.
Check how the worktop will meet the wall and how the doors line up. Any packing or support should be a deliberate, secured part of the assembly. Do not pull a cabinet into a distorted shape with mounting screws.
Design the cabinet attachment for the vehicle and the fully loaded furniture. Decorative lining, trim battens and the floor covering are not automatically adequate anchors. A kitchen can carry appliances, water and heavy cookware as well as its own weight.
Use the correct conversion/body guidance for your make, model and year, with competent design where needed. Identify permitted fixing positions and what lies behind or beneath them before drilling. Avoid hidden wiring, pipes, structural no-drill areas and exterior panels. Follow the specified fixing, corrosion-protection and sealing details.
There is no universal bracket, screw or bolt pattern this guide can approve. Keep the attachment accessible for the inspection and maintenance it requires, and save the installation details with your build records.
5. Template the worktop before making openings
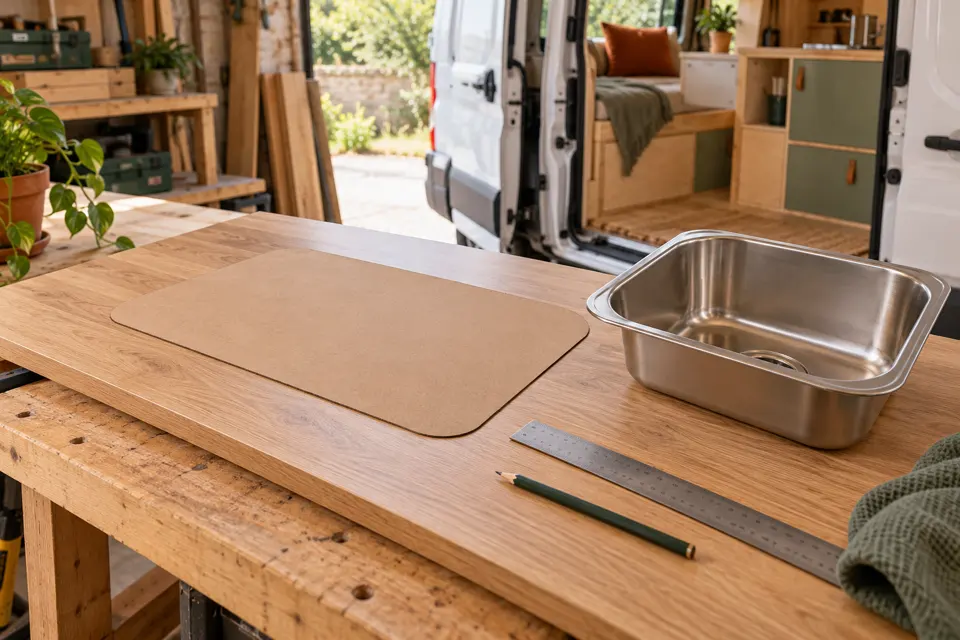
Template the outside shape against the fitted cabinets and finished wall first. Include the intended front overhang, end clearance and any edge treatment. Then place the actual appliance templates on it and check both above and below the surface.
Look underneath before marking a cut-out: a bowl, tap nut, hob body or retaining clip may meet a rail even though the top looks clear. Leave the support, material between openings and corner details required by the worktop and appliance instructions.
- Confirm the exact model and correct template version.
- If printing a template, verify its stated scale/check measurement rather than trusting “fit to page”.
- Check the intended face, orientation and position of each opening.
- Confirm access for clips, fasteners and connections below.
- Support the worktop and the piece being removed so the final cut does not tear or drop.
- Use the required cutting method and corner shape, then trial-fit without forcing the appliance.
Do not enlarge a cut-out simply because the appliance will not immediately drop in. Check the template, clips and instructions first. Cutting too far can remove the support the rim or fixing system needs.
6. Protect cut edges and fit the sink
Choose the edge treatment for the actual worktop material. Laminate can protect the face while leaving cut edges, holes and joints vulnerable to moisture. Follow the worktop manufacturer’s system rather than assuming a bead around the top rim protects everything underneath.
Prepare exposed cuts, tap holes and other penetrations as instructed, using compatible products and allowing the required cure. Check the sink’s gasket/seal and clip requirements separately.
Trial-fit the sink, tap and waste together. Check the space for tightening tools and the route of hoses and drainage before final fixing. A deep bowl can take the place you had planned for a drawer or shelf.
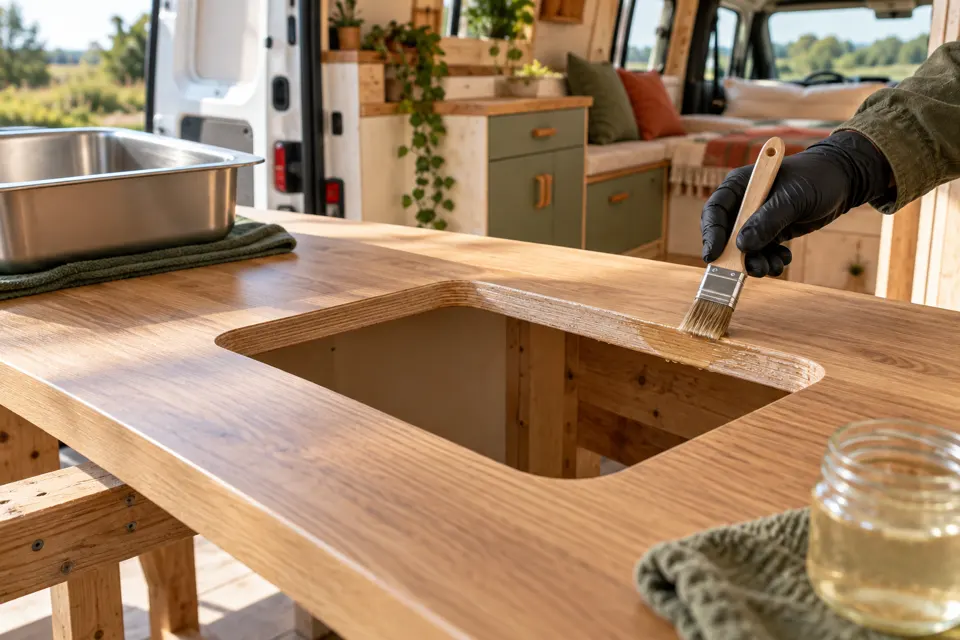
Fit the worktop using the specified supports and attachments, allowing any required material movement. Choose fastener length carefully so it cannot break through the face or damage a service below.
Have the water and waste installation completed and checked as appropriate to the chosen system. Inspect accessible joints and the underside during testing before filling the cupboard with belongings. Water should not escape into the cabinet or vehicle structure. Keep the route for later inspection usable.
Give the hob its required space and protection
Work from the installation manual for the exact hob. Confirm the permitted worktop, cut-out, support, distance from combustible surfaces, space underneath, ventilation and any specified heat shield or enclosure details. An attractive splashback does not automatically provide the required protection.
Think about the real cooking envelope: pan handles, steam, an opening lid if fitted, nearby windows, curtains and anything above the hob. Do not treat an overhead cupboard or a shelf as acceptable just because it appears in a kitchen picture. Keep loose items and fabrics clear before cooking.
For an electric hob, agree the supply, protection and installation with the electrical designer/installer. An induction hob being plug-in does not prove the van’s inverter, cabling and battery system can support it.
For LPG, arrange installation and commissioning with a competent leisure-vehicle LPG specialist, using the appropriate qualifications/registration for the work and vehicle use. Plan the gas storage, pipe routes, isolation, ventilation and required tests as a complete system. This page does not provide gas-connection instructions.
Dry-fit the fridge and preserve its air path
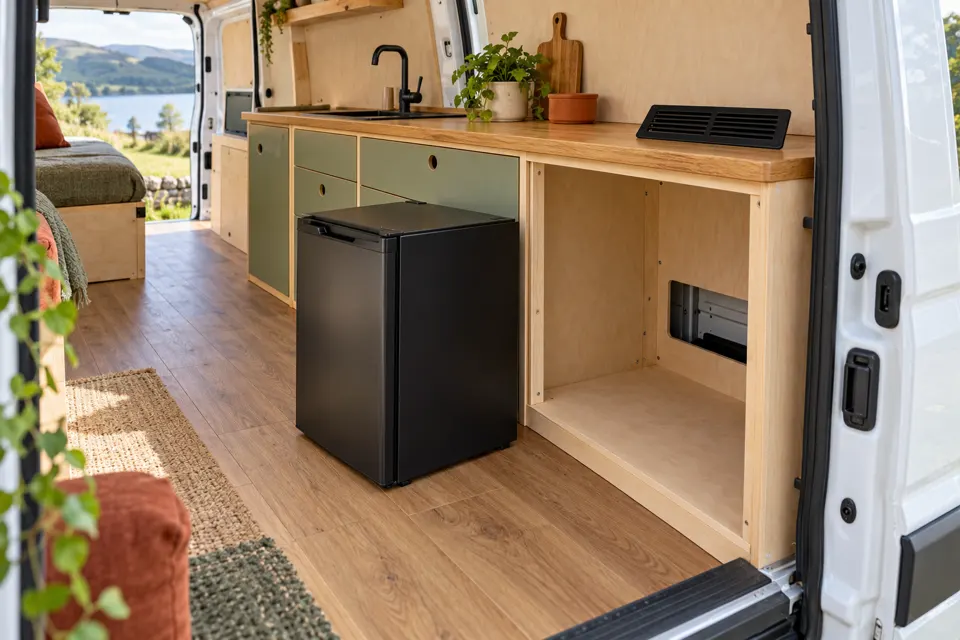
Confirm the mounting and ventilation arrangement for the actual fridge. Different technologies and models have different requirements; a compressor-fridge arrangement is not interchangeable with an absorption-fridge installation.
Provide the required support, mounting frame and clearances. Plan a complete route for cooling air to enter and warm air to leave, following the manufacturer’s instructions. A grille with no useful air path behind it may achieve very little.
Check the door swing, handle, travel latch and access to shelves or drawers. Include the adjacent kitchen fronts and the person standing in the aisle. Leave a route to remove the appliance for servicing without dismantling permanent gas or water installations.
Have the power supply and any other required connections installed and checked appropriately. Keep the required ventilation clear after adding trims, shelves and stored items. Use the appliance’s travel closure as instructed.
Leave room to inspect and maintain
Before closing the backs, photograph the routes and write down where access is needed. Try reaching each inspection point with the cabinet in position. A small hatch may show a component without leaving enough room to repair or remove it.
Protect services where they pass through furniture and keep their routing, separation and clearances appropriate to the installation. Do not let a drawer scrape a hose or a fixing project into a cable route.
Check removable panels with the worktop, doors and neighbouring furniture fitted. Keep required isolation points and ventilation accessible in everyday use.
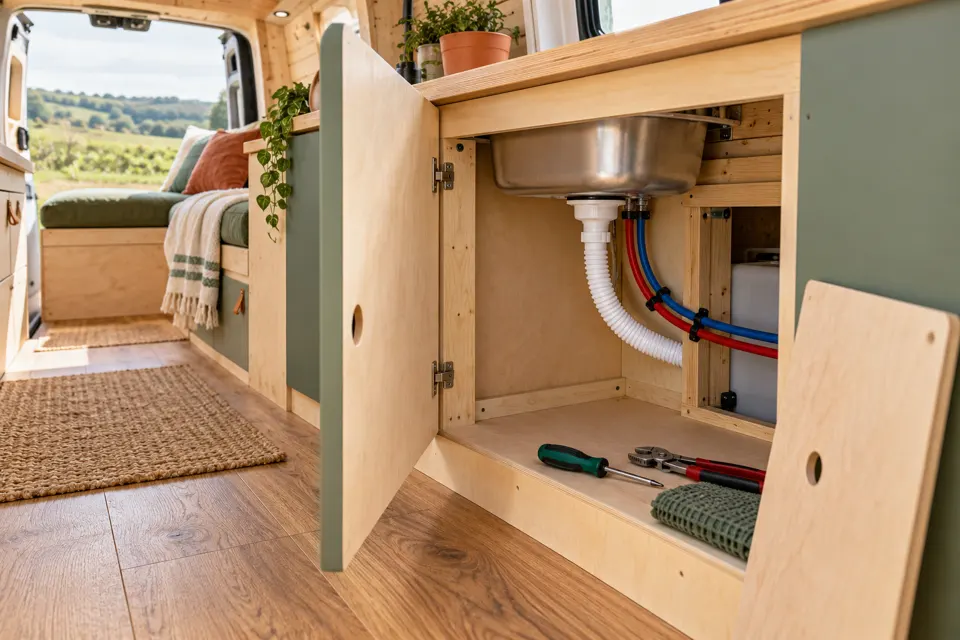
A removable water container can be a simple choice for some builds, but it still needs suitable restraint and a practical filling, emptying and cleaning routine. Fixed tanks also need their own mounting and access. Do not put an unplanned gas cylinder in the spare under-sink cupboard.
7. Fit doors, drawers and practical storage
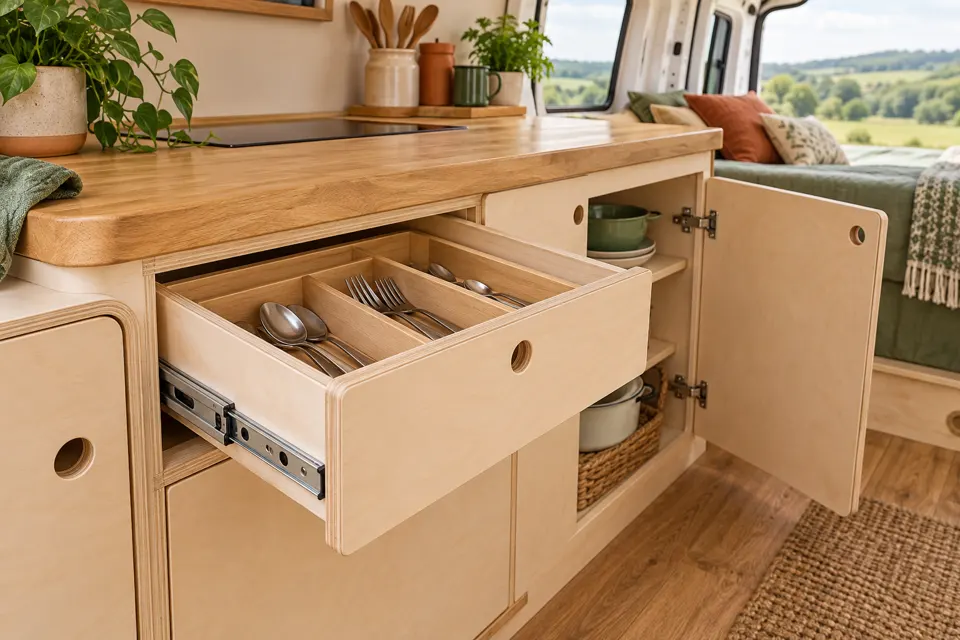
Fit the fronts after checking the carcasses are square and secure. Follow the hinge or runner maker’s dimensions and mounting instructions. Allow the required clearances between fronts and at walls.
Choose hardware for the intended contents and vehicle use. A drawer runner’s stated load rating does not rate the cabinet, its fixings or its travel latch. Soft-close action is not automatically a positive travel lock.
Test the full movement with the real pot, frying pan, plates and cutlery tray. Place heavier cookware sensibly and provide suitable restraint so it cannot shift or fall out.
Use dividers and removable containers to make storage easier to clean. Store knives in a suitable secure holder, keep fragile items protected and avoid filling the gap reserved for appliance ventilation. A shelf edge or lip alone may not restrain every item in a moving vehicle.
Before travel, close and latch doors and drawers, secure loose worktop items and use appliance travel closures. Keep the required exit route clear.
8. Finish the edges and check the whole kitchen
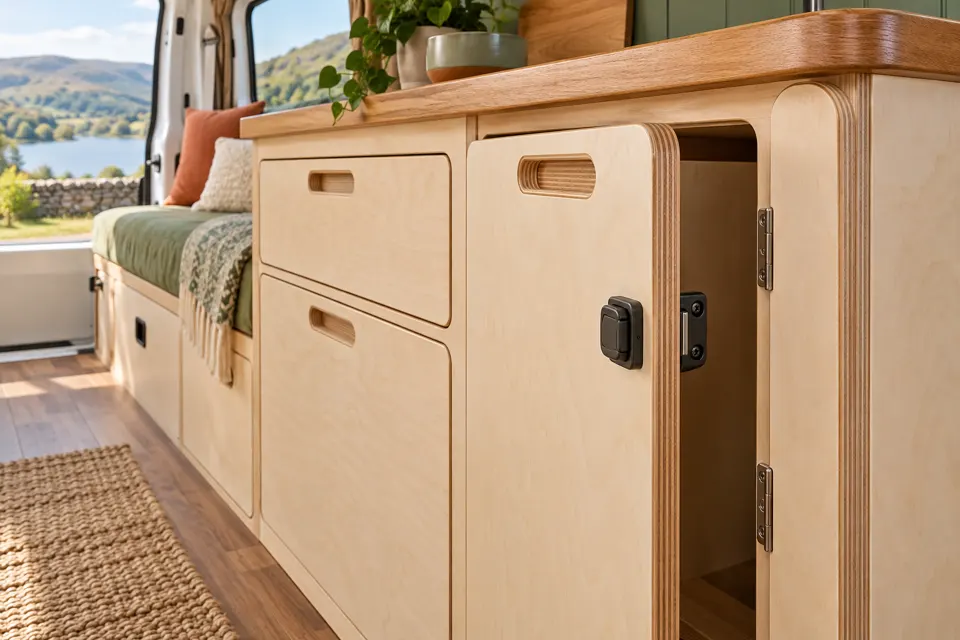
Ease sharp exposed corners and remove splinters without weakening structural parts. Treat cut edges and surfaces as required by the chosen materials. Allow finishes and adhesives to cure before enclosing them or storing food and utensils.
Check worktop support, cabinet joints, attachment, hinges, runners and closures against the specified design. Stop and correct any rocking, twisting, loose connection or rubbing service. Decorative trim should not hide a structural problem.
Test normal tasks with the appliances safely installed: washing up, opening the fridge, preparing food and reaching storage. Check again after the first use and follow the maintenance/inspection requirements of the furniture, hardware and appliances.
Tools and materials
| Job | Useful items |
|---|---|
| Setting out | Tape, cardboard, pencil, square, straightedge, cutting list and actual appliance templates. |
| Cabinet construction | Specified panels/frame material, stable work support, clamps, suitable saw/blades, drill bits and assembly hardware. |
| Worktop and edges | Suitable worktop, required cutting tools, compatible edge treatment, seal/gasket systems and supports. |
| Storage | Suitable hinges, runners, latches, shelf supports and restrained organisers. |
| Protection | Appropriate dust extraction, eye/hearing protection, respiratory protection for the task and protection for the van’s finish. |
Control cutting and sanding dust at source. Use appropriate on-tool extraction and a separate work area, plus protective equipment selected for the task. HSE recommends M- or H-class extraction for this work and suitable respiratory protection where required; tight-fitting masks need correct fit. Follow tool and product safety instructions, and vacuum appropriately rather than blowing dust through the van.
Time, weight and a furniture-only budget
Build the shopping list from your cutting list and hardware plan. Include rails, shelf parts, fronts, backing, edge treatment and the worktop supports as well as the visible panels. A cheap offcut can be useful if its material and condition are known and suitable.
| DIY furniture allowance | Illustrative amount |
|---|---|
| Cabinet material and fronts | £120–£300 |
| Worktop and basic edge treatment | £60–£180 |
| Hinges, runners, closures and assembly hardware | £60–£160 |
| Finish and consumables | £30–£80 |
| Example furniture total | £270–£720 |
These are CamperSteps editorial planning allowances, not checked supplier quotations. They exclude sink, tap, hob, fridge, water/gas/electrical systems, tools, labour, specialist vehicle anchoring and appliance installation. Premium panels, multiple drawers or a bought kitchen pod may cost more. Get separate figures for the actual appliances and installation work.
Keep furniture in Van build → Kitchen and keep appliances and services in their appropriate existing allowances. If a bought pod includes appliances, check what its total covers before also budgeting them separately. Reading this guide does not alter a saved plan or select equipment.
Record the complete installed weight and planned contents. As an arithmetic example, 30 kg of furniture, a 12 kg worktop and an 18 kg fridge total 60 kg before other appliances, water and cookware. These are invented weights, not a recommended assembly or a payload approval. Check vehicle and axle loading for the complete conversion.
Allow several working sessions for mock-ups, cutting, assembly, trial fitting and finishing, plus curing time and any installer visits. The fiddly work around openings and drawers often takes longer than building the main boxes. Finish a simple usable kitchen before adding optional decorative details.
Before using the kitchen
- Actual appliance identities, instructions and cabinet requirements are confirmed.
- The finished layout leaves practical working space, opening clearance and a usable route in and out.
- Cabinets, worktop and appliances have the appropriate support and vehicle attachment.
- Cut-outs match the correct templates, with required edge treatment and support.
- Hob clearances, protection and ventilation follow its installation requirements.
- The fridge has its specified mounting and unobstructed cooling-air route.
- Water, gas and electrical work has been completed and checked by appropriately competent people.
- Service access and required isolation points remain usable after storage is loaded.
- Doors, drawers, appliances and contents have suitable travel closures or restraint.
- Surfaces are finished and cured, edges smooth and connections accessible for inspection.
- Furniture, appliance and system costs are recorded without double-counting.
You now have the kitchen furniture planned around the real appliances and the finished van. Keep the manuals, route photos and attachment details together for later inspection and maintenance.
Instructions and further reading
Original CamperSteps writing and illustrations. The sequence and planning examples are general editorial guidance; pictures do not specify dimensions, heat clearances, structural fixings or service connections. Use current instructions for the actual vehicle, materials and appliances.
- Ford Pro: vehicle-conversion resources—obtain the appropriate body/conversion manual for your own vehicle.
- EGGER: sink and hob cut-outs, and worktop processing instructions—examples of material-specific cutting, support and moisture protection.
- Thetford: example hob installation manual—cabinet, support, clearance and protection requirements differ between models.
- Dometic: NRX-series refrigerator guidance—an example of ventilation and travel-closure requirements; obtain the installation manual for your exact variant.
- HSE: cutting and sanding wood.
Source information checked 1 November 2026. Example prices, weights and dimensions are editorial planning figures, not supplier quotations or confirmed vehicle measurements. Appliance examples are not additions to the equipment catalogue.