
Stage 6 · Make the shell more comfortable
Sound treatment and insulation
An empty van can sound like a drum and feel chilly long before bedtime. The right materials, fitted carefully, can make it quieter and easier to keep comfortable. Start with a sensible system—not a promise that one shiny roll will do everything.
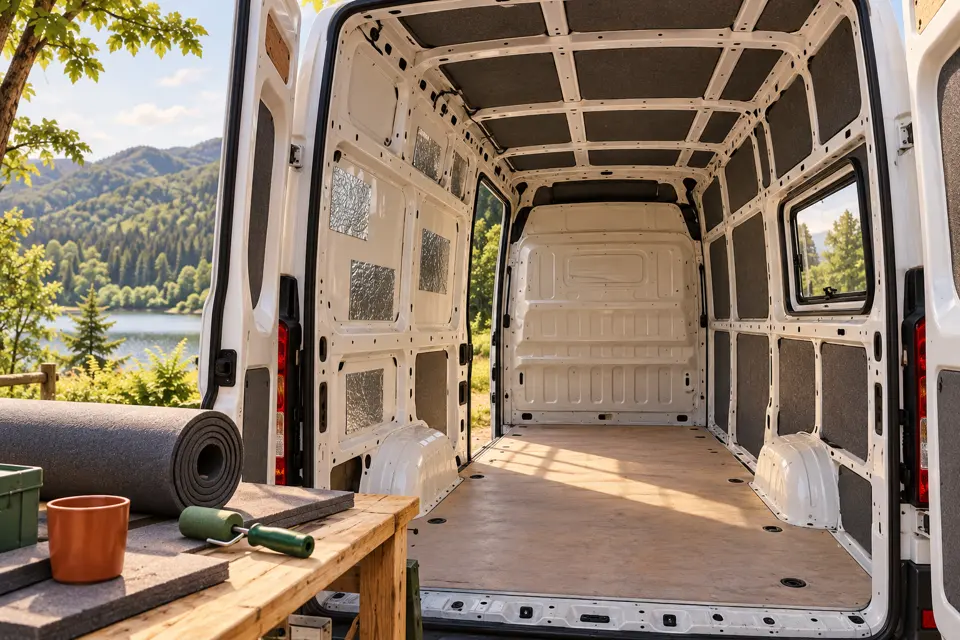
Sound treatment is not the same as insulation
Before ordering anything, separate the jobs. A heavy mat may reduce the boom from a large metal panel, while a thermal layer slows heat moving through the shell. They are not interchangeable simply because both are sold in rolls.
| Material | Main purpose | What it does not automatically do |
|---|---|---|
| Vehicle panel-damping mat, commonly butyl with a foil face | Reduces vibration and resonance in the panel it is properly bonded to. | Provide substantial thermal insulation or stop all road noise. |
| Suitable closed-cell insulation sheet | Provides thermal resistance in a relatively thin, flexible layer. | Make the entire van condensation-proof regardless of gaps and detailing. |
| Suitable fibre or fleece insulation | Fills appropriate deeper spaces as part of a planned thermal/acoustic build-up. | Seal vapour, waterproof a cavity or work properly when stuffed into every gap. |
| Dense acoustic barrier | Can reduce sound transmission as part of a correctly designed assembly. | Replace thermal insulation or be suitable for every surface without support. |
| Reflective foil or foil/bubble product | Can contribute to a specified reflective or moisture-control assembly. | Deliver a quoted air-gap-based insulation value when squeezed between solid layers. |
“Soundproofing” is often used loosely. A van still has glass, door seals, a cab, tyres and moving components. Aim for a more comfortable vehicle, not guaranteed silence. Rattling furniture and loose trim will need attention later too.
1. Choose a system that suits your build
For a beginner conversion, choose a small set of compatible vehicle-suitable materials and follow their instructions. A common approach is selected panel damping followed by an appropriate thermal layer, with suitable additional insulation only where the available space and system call for it. That is a planning approach, not a fixed recipe for every van.
- How you will use it: cool evenings, winter stays and hot summer trips bring different demands. Insulation slows heat flow; it does not generate heat or actively cool the van.
- Space: allow for insulation, supports and lining before fixing bed width, finished headroom and window surrounds.
- Weight: heavy acoustic products can add up quickly. More coverage is not always the best use of payload.
- Installation conditions: check adhesive temperature limits, surface requirements, curing and ventilation.
- Suitability: check the actual product’s intended use, temperature limits, fire information, moisture behaviour and fixing method.
Buy from a supplier who can explain the complete build-up. A generic roll described as “camper insulation” does not tell you whether it is appropriate for a hot roof, a load-bearing floor or a heater-adjacent area.
Plan battens or other lining supports and the route of cables and pipes before you hide the metal. Installation order varies: some supports and services need fitting before particular insulation layers. Keep the whole assembly in mind rather than finishing one layer and discovering the next job cannot be fitted.
Condensation: think beyond the insulation roll
Warm, moist air can condense when it meets a sufficiently cold surface. Breathing, cooking, damp clothes and washing all add moisture. Insulation, ventilation, heat and everyday habits work together; none should be treated as a universal cure on its own.
Product choice and continuity matter. A suitable closed-cell system can resist moisture movement, but unsealed joints, service penetrations and exposed cold metal still need consideration. A fleece layer is not a vapour barrier simply because it is behind plywood.
Do you need a separate vapour-control layer? There is no single answer that covers every mixed van build-up. Follow a coherent design for the chosen materials, climate and use. If the system specifies a vapour-control layer, it needs appropriate joints, edges and penetrations; adding random foil afterwards is not the same thing. Seek advice before enclosing materials between low-permeability layers where moisture could become trapped.
For reflective products, check what the quoted performance includes. Reflectix, for example, specifies air-space conditions for its published application claims. Those building assemblies are not a ready-made van design. A reflective face pressed against another layer should not be credited with the same air-gap-based performance.
2. Prepare the shell for a lasting bond
Check that rust repairs and protective coatings are complete and have reached the required cure stage. Inspect after rain and revisit any questionable roof or window edge. It is much easier to see a water track now than after the wall is lined.
- Remove dust, swarf and loose material from the work area.
- Clean with a process compatible with the factory paint, repair coatings and adhesive.
- Let surfaces and seams dry fully. Do not apply over condensation on a cold panel.
- Check the product’s storage and application conditions; cold material and cold steel can make fitting difficult.
- Mark access points, drains, fixings and services that need to stay clear.
Do not remove sound factory paint just to make the shell look uniformly bare. Do not stick over grease, failing paint or rust. If cavity wax is already present, keep it away from bonding areas and ask the adhesive supplier how to manage contamination.
Wear task-appropriate gloves and eye protection when handling sharp mat edges or cutting materials. Follow safety data for adhesives and fibres, use suitable dust control, and provide the required ventilation. Do not use a naked flame to warm materials or work beside ignition sources when using flammable adhesives.
3. Apply the panel-damping layer where it is useful
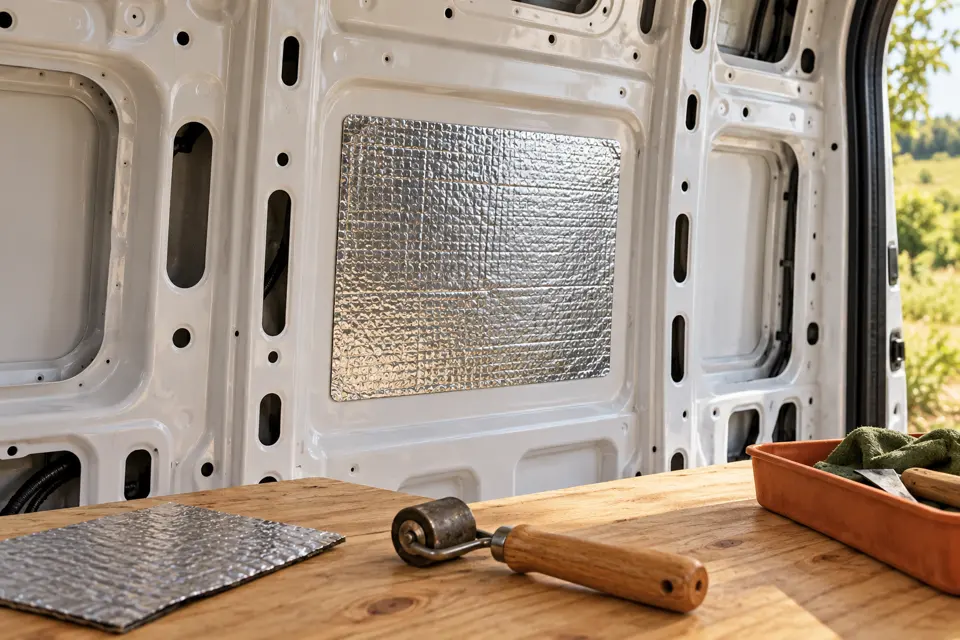
Start with the manufacturer’s advice on which panels to treat and how much coverage the chosen product needs. Large, relatively flexible single-skin areas are different from tightly pressed or reinforced areas. Do not assume that a whole van needs wrapping in heavy mat.
- Plan patches around the intended openings, access points and the product’s permitted locations.
- Cut on a safe surface with tools suited to the material. Handle foil edges carefully.
- Offer up the piece before removing its release backing.
- Bond it onto the prepared panel and use the specified roller/pressure method so it makes proper contact.
- Inspect edges, corners and recesses rather than leaving the material bridging a hollow space.
Manufacturer coverage guidance varies with the product and aim. Use that guidance instead of treating an internet percentage as a rule. Full coverage adds cost and weight; too little or poorly bonded material may also disappoint.
Do not add layers simply because an area still sounds different when tapped. A tap can help compare a panel before and after treatment, but it is not an acoustic test or proof that the finished van will meet a noise target.
4. Cut and fit the thermal layer carefully
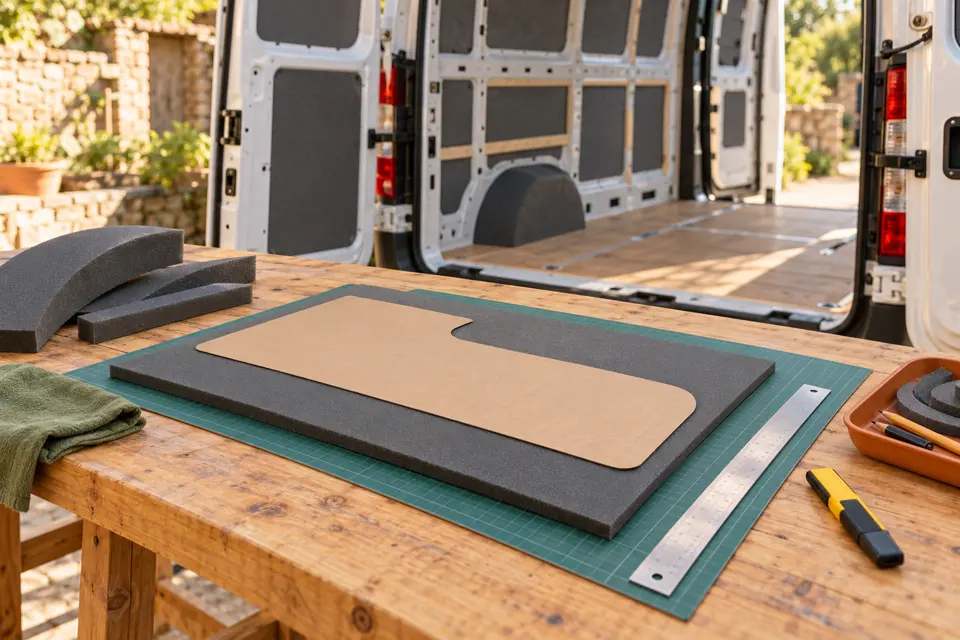
Work one manageable area at a time. Cardboard templates help around wheel arches, window returns and curved roof bays. Mark the orientation so a piece cut for one side is not accidentally reversed on the adhesive face.
Choose thickness for the actual available space and the system’s performance, not simply the thickest roll you can buy. Check that the finished lining will fit without crushing insulation or distorting window frames. A thinner, carefully detailed section can be more practical at a tight return than a thick piece forced into place.
- Measure or template the accessible area, keeping required fixings and openings clear.
- Cut the piece on a protected bench and trial-fit it with the backing still in place where possible.
- Apply it using the specified method. With self-adhesive sheets, expose the backing progressively so the whole piece does not stick in the wrong position at once.
- Bring joints together as instructed without stretching material to bridge a missing piece.
- Use compatible jointing adhesive or tape only where the chosen system specifies it, and inspect the completed seam.
Pay attention to overhead adhesion. A sheet that looks attached for a few minutes may not remain secure in roof heat and vibration. Follow the product’s substrate preparation and support requirements; do not rely on the ceiling board to catch material that is already peeling away.
Keep compatible offcuts for small returns. Avoid creating a patchwork of loose pieces with poorly detailed gaps just to use every scrap. Check any second layer is part of the planned assembly and that its adhesive can bond to the first layer’s surface.
5. Treat deeper bays without stuffing the van
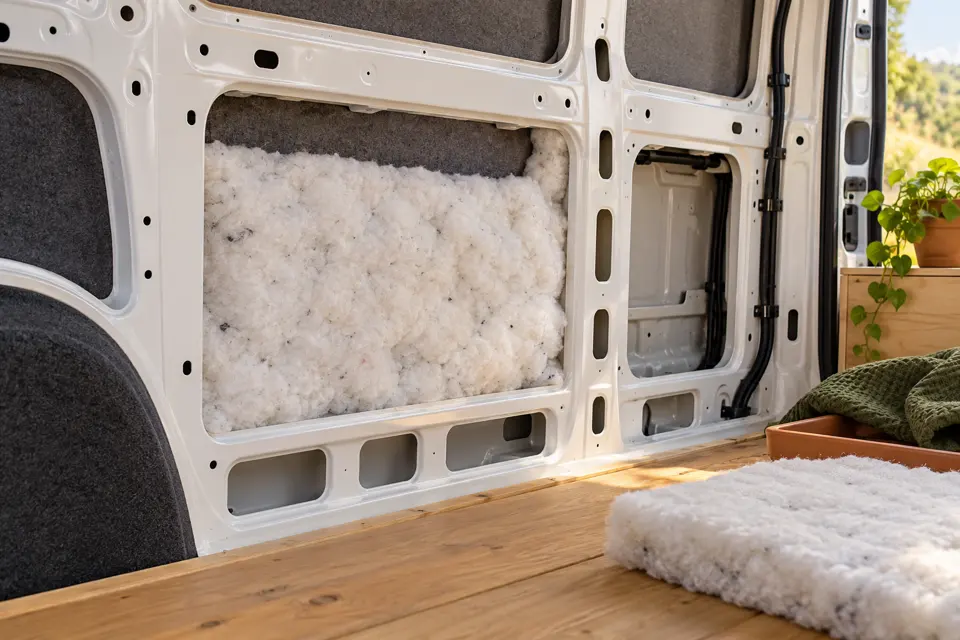
Some systems use a suitable fleece or other fibrous material in deeper accessible wall bays. Match the material and its intended thickness to the available space. Its ability to trap air is not improved by compressing a thick wad into a much smaller gap.
Retain material by the method specified for that product and location so it cannot slump into a drain or moving mechanism. Do not push insulation blindly into pillars, closed sections or doors. Identify what the cavity does before deciding whether it is suitable to treat.
Keep access to locks, cables, fasteners, inspection points and maintenance items. Do not leave loose fibres where they can reach moving parts or equipment intakes. Protect yourself from dust and fibres as the product guidance requires.
Natural fibre, recycled-polyester fleece and mineral-wool products have different handling, moisture, fire and installation properties. A household loft roll is not automatically an equivalent substitute for a vehicle-suitable material. Ask the supplier about the exact product rather than relying on a general claim about the fibre type.
Ribs, fixings and cold bridges
Steel ribs and other metal connections can conduct heat past insulation in the broad wall bays. A suitable thin insulating strip between accessible metal and a lining support may reduce a local bridge where the assembly allows it. It does not remove every route for heat flow.
Do not cut structure or compromise a secure fixing to eliminate a cold bridge. Furniture and safety-related attachments need their proper load path. Soft foam trapped under a heavily loaded fixing is not a substitute for an approved mounting arrangement.
Pay attention to window surrounds, the cab connection, door frames and wheel arches. These awkward areas can dominate comfort even when the big panels look finished. Keep the maker’s necessary clearances and access rather than trying to cover every last visible piece of metal.
Floor, doors and services need their own decisions
Floor: check the complete height from the metal corrugations to the finished walking surface. Consider standing headroom, steps, door thresholds and furniture mounts. Floor insulation needs a suitable load-support arrangement; a soft wall liner is not automatically a load-bearing floor product. The detailed floor build-up belongs in the flooring stage.
Doors: leave drainage, lock mechanisms, handles and wiring functional. Check that added material does not foul trim, hinges, seals or the full sliding movement. Do not make a door heavier without considering how its hardware operates.
Wiring: plan protected routes and document them before covering. Cable current capacity depends on its installation conditions, including being surrounded by insulation. Have the electrical design account for that; do not simply bury an existing cable and assume its rating is unchanged. Keep required connections and service access reachable.
Heat-producing equipment: heater bodies, flues, combustion pipes, hobs and other equipment have their own required clearances and approved protection. Ordinary insulation is not a heat shield. Get the actual equipment requirements before lining around it.
Keep a few reference measurements and photos of hidden routes. Later, when a cupboard needs another screw, knowing where the cable runs is far more useful than a perfectly tidy but undocumented wall.
Estimate quantities—and remember the weight
Start with your van model and a rough allowance in the plan. Before ordering, measure the surfaces you actually intend to treat, subtract large openings, and sketch how sheets or rolls will be cut. Nominal van floor area is not the total of the walls, roof and doors.
Allow for practical offcuts and the pack sizes you can buy. A little spare is useful, but doubling an order “just in case” can be costly. Check whether a kit’s advertised coverage is the mat area in the box or a claim about the vehicle area it can treat.
Multiply the selected material area by its stated mass per square metre and add the other layers. For example, 5 m² of a hypothetical 3 kg/m² material adds 15 kg before insulation, lining and fixings. Use the real product figures; foam and dense acoustic barrier can differ substantially.
Keep packaging labels or receipts showing the product and quantity. This makes budget updates and later maintenance easier and helps avoid buying the same materials again under a second allowance.
Time and budget
Allow a few unhurried sessions for templating, cutting and fitting, plus the preparation and curing periods required by the system. Roof work and awkward returns often take longer than the large flat panels. You do not need to finish the whole van in one weekend.
| Example planning category | Editorial materials allowance |
|---|---|
| Selected panel-damping treatment | £100–£250 |
| Thermal sheet insulation for the planned areas | £200–£450 |
| Additional suitable cavity material, if required | £50–£150 |
| Compatible adhesives/tapes, cleaning and small consumables | £40–£100 |
Those categories total about £390–£950, if all are needed. These are broad editorial estimates, not live supplier quotes or a complete kit for every van size. Tools, labour, repairs, lining, flooring supports, specialist barriers and extra protection are separate. A small van with a simpler system may need less; a large or demanding build may cost more.
Budget sensibly: prioritise a sound dry shell, suitable materials and careful fitting. Borrow the roller or tools where appropriate, plan cuts and use compatible offcuts. Do not save money by leaving a leak, omitting required protection or buying an unsuitable material.
Use your plan’s sound-treatment, insulation, tape and adhesive rows to track actual selections. Replace broad allowances with complete delivered costs as you obtain them. Do not add this page’s example total on top of the same materials already selected.
Common mistakes that are easy to avoid
- Calling every roll “insulation”: choose it for the job it actually performs.
- Covering unresolved rust or leaks: finish the shell work first.
- Heavy mat everywhere without a plan: check product coverage, cost and payload.
- Stretching foam across a gap: cut and detail joints as the system requires.
- Stuffing fleece tightly into every hole: retain the right material in suitable spaces and leave drainage/access clear.
- Copying a foil layer without its required air space: check the complete performance claim.
- Burying services or closing vents: plan access, ratings and airflow before lining.
- Assuming no future condensation: keep ventilation and moisture management in everyday use.
Your checkpoint before the lining goes on
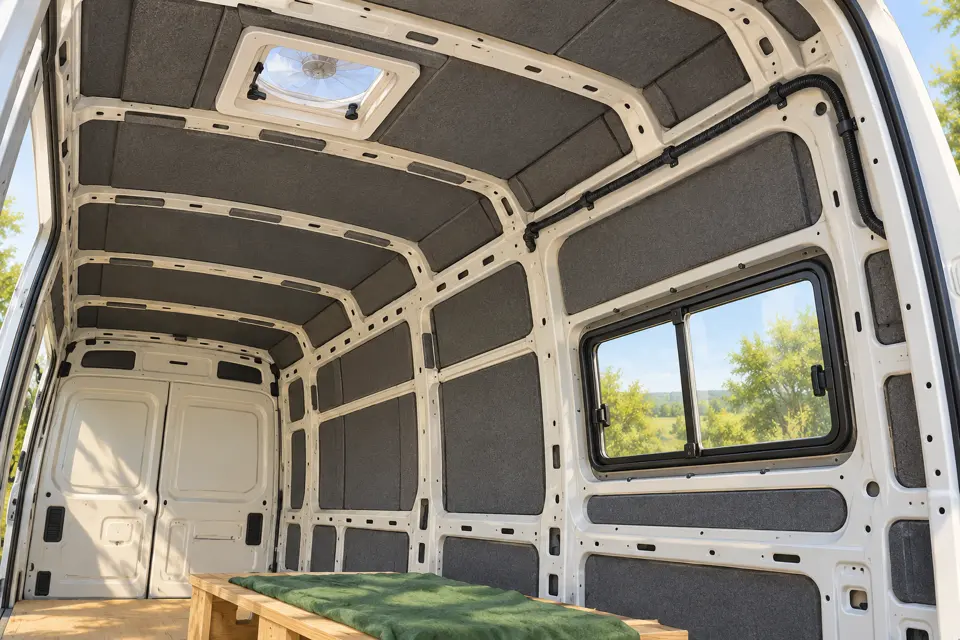
- Rust repairs, window/roof openings and leak checks are complete.
- Chosen materials and adhesives suit their actual locations and conditions.
- Damping patches are properly bonded without loose edges.
- Thermal pieces and joints follow the chosen system; material is not stretched or unnecessarily compressed.
- Drainage, permanent ventilation, moving parts and maintenance points remain clear.
- Service routes, cable installation conditions and equipment clearances have been accounted for.
- Finished wall/floor/ceiling thickness and secure mounting arrangements are planned.
- Adhesives and coatings have reached the required stage before enclosure.
- Hidden routes, fixings and product details are photographed and recorded.
Run through the list while you can still see the shell. A loose corner or missing route is an easy correction now; behind a finished ceiling it becomes a much bigger job. Next comes the practical lining and floor build-up, with the support and service plan already in mind.
Instructions and further reading
Original CamperSteps writing and illustrations. This is a beginner planning guide, not a tested insulation design for your exact vehicle. Follow the chosen products’ current technical and safety information and your van maker’s conversion guidance.
- Dodo Mat: vehicle sound treatment and insulation—manufacturer-specific product roles and coverage guidance.
- Armacell: ArmaFlex application manual—product-specific preparation and jointing methods, not approval of a complete van assembly.
- Reflectix: air-space requirements for its published applications—why a quoted assembly value cannot simply be transferred to a compressed van lining.
- IET Wiring Matters: cable installation conditions and thermal insulation—general electrical-design context, not a van circuit design.
- HSE: safe motor vehicle repair.
- CamperSteps: windows and ventilation—airflow and permanent ventilation are separate considerations.
Sources checked 1 November 2026. Costs and quantity examples are editorial allowances; no comfort, noise, condensation, fire or installation certification is implied.